Table of Contents
Introduction to FOG Imaging
Fog imaging or “Free Open-Source Ghost” is an open-source piece of cake used for imaging solution licensed under GPL. It will support different version of Linux, Mac and Windows to be cloned. It’s available for most of the distributions like Centos, RHEL, Fedora, Debian and Ubuntu.
FOG has a polished Web UI powered by PHP, All the operations will be done through TFTP and PXE. Most of the network cards will support to boot PXE. In a single go, we can image multiple systems in a short time.
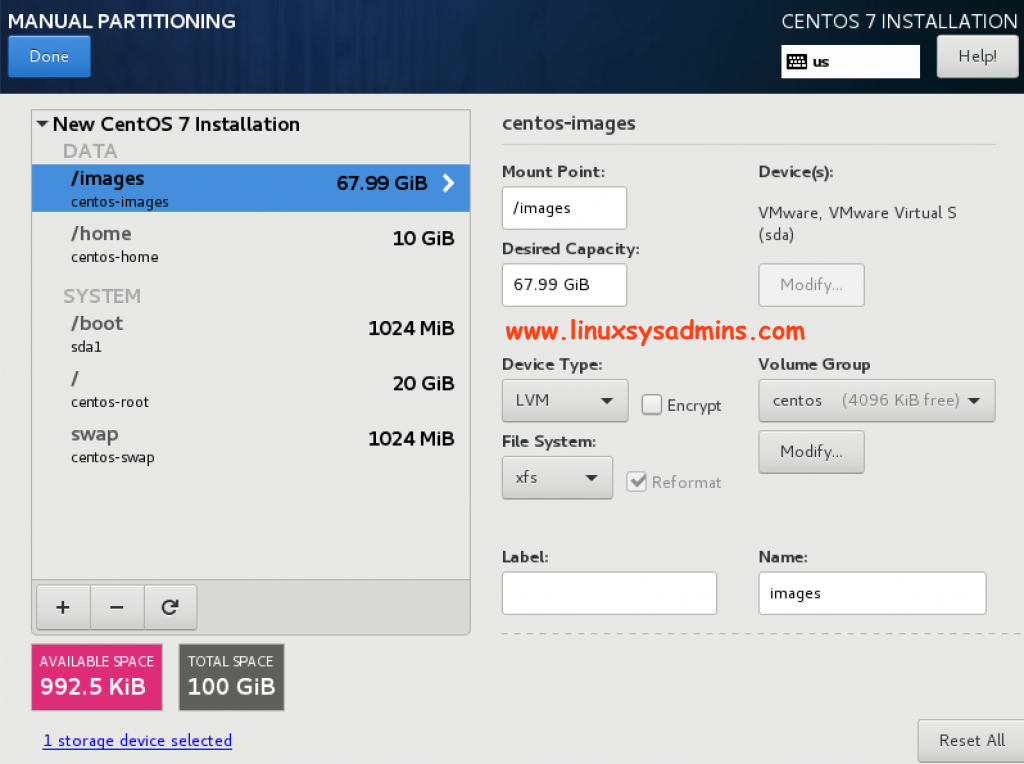
We need a customized disk partition to implement fog server. Most of the space will be allocated for /images partition. It’s good to have a minimum 4 GB of memory and 2 v CPU for faster image compression and decompression while imaging a system.
Warning: Using FOG under any production environment is your own risk it may cause “COMPLETE DATA LOSS” in case if you are not aware what you are doing.
System Requirement
- Minimum 1 GB Memory
- 1 v CPU or large in size
- 1 GB NIC minimum or higher speed one
- 100 GB minimum disk space
Features
- Fog Supports PXE boot with DHCP, TFTP and iPXE
- Number of windows versions like XP, Vista, 7,8,10, Linux and Mac OSx are supported for imaging
- We can join to the domain and change the host-name
- Remote management of a system like a shutdown and log off
- Supports full disk partitions, multiple disks partition, resizing and RAW disk
- Scan for bad blocks on the remote system
- Restore deleted files using fog and much more.
FOG Project Important URL’s
- Git Repo https://github.com/FOGProject/
- Forum https://forums.fogproject.org/
- To know Compatible Device lists Click Here.
- IRC Support Channel #FOGimaging
- Donate to Fog Project through pay-pal by clicking Here
FOG Server Custom Partition Layout
If you are looking to how to install CentOS 7 with step by step guide have a look into CentOS 7 Installation. Make sure to use the partition as follows during the installation for Fog server installation.
Install OS with custom partition layout as shown below.
Network Configuration
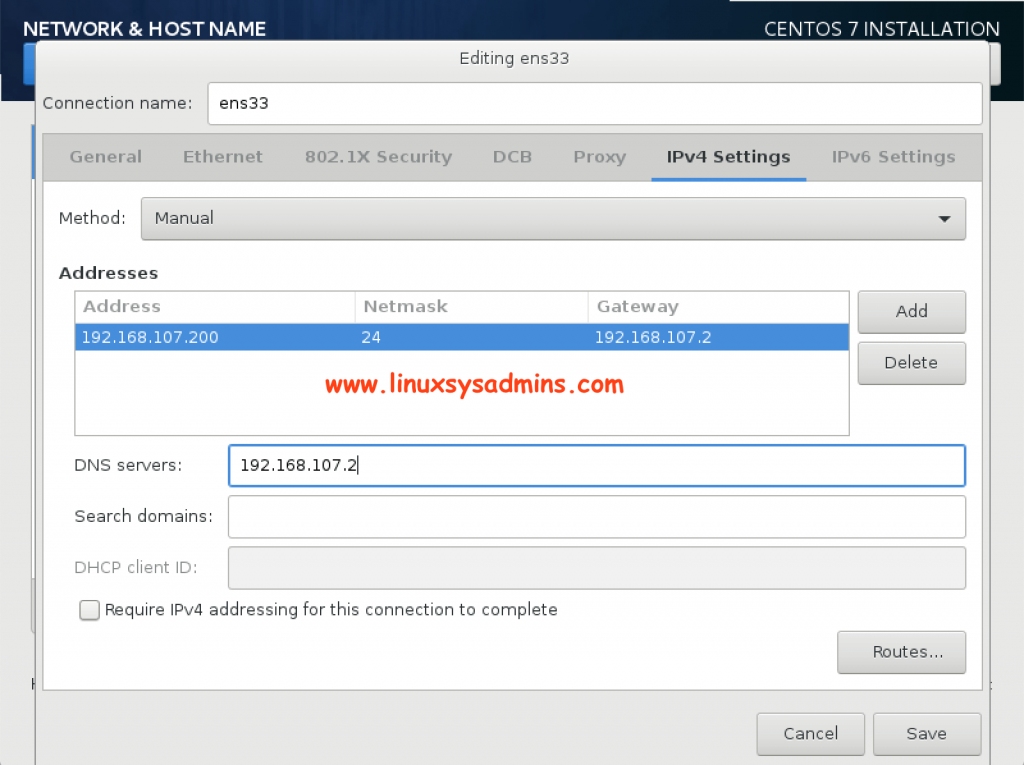
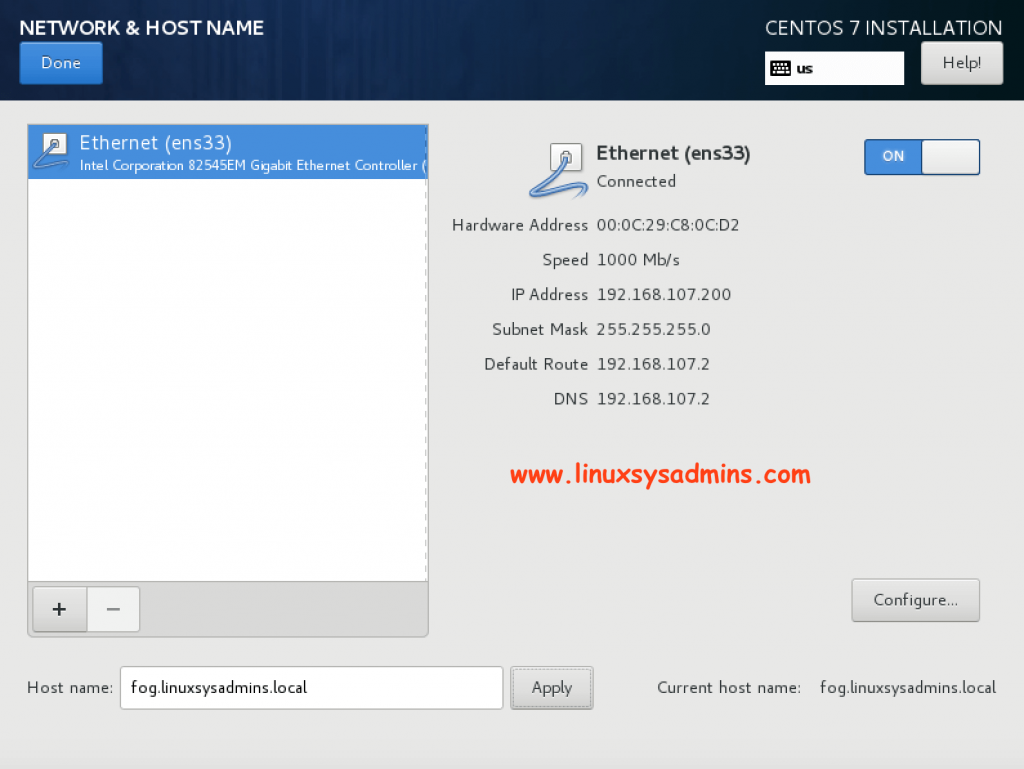
We need to have a static IP address for server setup. This can be done during the OS installation or post configuration can be done using nmcli or nmtui.
Assign Hostname and enable the interface
OS Post-installation configuration
Patch the OS
Once completed with OS installation we need to make sure the server patched with up-to-date packages.
# yum update -yLanguage settings
Set the system locale and keyboard layout settings
# localectl set-locale LANG=en_US.utf8
# localectl set-locale LC_CTYPE=en_US.utf8
In case if we don’t have a valid DNS server it’s safe much required to add the local host entry below the default localhost.localdomain line.
Resolve Local DNS
# cat /etc/hosts
192.168.107.200    fog.linuxsysadmins.local
Firewall Settings
By default during the installation firewalld service will be up and running.
[root@fog ~]# systemctl status firewalld
 ● firewalld.service - firewalld - dynamic firewall daemon
    Loaded: loaded (/usr/lib/systemd/system/firewalld.service; enabled; vendor preset: enabled)
    Active: active (running) since Wed 2019-06-12 02:16:48 IST; 2min 12s ago
      Docs: man:firewalld(1)
  Main PID: 6311 (firewalld)
    CGroup: /system.slice/firewalld.service
            └─6311 /usr/bin/python -Es /usr/sbin/firewalld --nofork --nopid
 Jun 12 02:16:47 fog.linuxsysadmins.local systemd[1]: Starting firewalld - dynamic firewall daemon…
 Jun 12 02:16:48 fog.linuxsysadmins.local systemd[1]: Started firewalld - dynamic firewall daemon.
 [root@fog ~]#
In case, If you are performing installation in anyone of the existing server make sure to start and enable the firewall service.
# systemctl start firewalld
# systemctl enable firewalld
Allow services to enable the required ports. Make sure to allow DHCP and DNS as well.
# for service in http https tftp ftp mysql nfs mountd rpc-bind proxy-dhcp samba; do firewall-cmd --permanent --zone=public --add-service=$service; done
# for service in dhcp dns; do firewall-cmd --permanent --zone=public --add-service=$service; done
Allow required additional ports and reload the rules.
 # firewall-cmd --permanent --add-port=49152-65532/udp
 # firewall-cmd --permanent --direct --add-rule ipv4 filter INPUT 0 -p igmp -j ACCEPT
 # firewall-cmd --reload
Verify the added firewall ports and services.
[root@fog ~]# firewall-cmd --list-all
 public (active)
   target: default
   icmp-block-inversion: no
   interfaces: ens33
   sources:
   services: ssh dhcpv6-client http https tftp ftp mysql nfs mountd rpc-bind proxy-dhcp samba
   ports: 49152-65532/udp
   protocols:
   masquerade: no
   forward-ports:
   source-ports:
   icmp-blocks:
   rich rules:
SELinux Configuration
Set SELinux in permissive mode, Official guide recommend to put the SELinux in permissive mode. In case, if you need to try out with SELinux its good to have a read by clicking here How to start using SELinux or Security-Enhanced Linux.
# sed -i.bak 's/^.\SELINUX=enforcing\b.$/SELINUX=permissive/' /etc/selinux/configStarting with Fog Setup
Fog Project pushed and maintained in git Repository, so we need to install with git before starting with the clone.
# yum install git -y

 Installed:
   git.x86_64 0:1.8.3.1-20.el7
 Dependency Installed:
   perl-Error.noarch 1:0.17020-2.el7      perl-Git.noarch 0:1.8.3.1-20.el7      perl-TermReadKey.x86_64 0:2.30-20.el7
   rsync.x86_64 0:3.1.2-6.el7_6.1
 Complete!
Start to clone the Fog by creating a directory in any name.
# mkdir git && cd git/
# git clone https://github.com/FOGProject/fogproject.git

 Cloning into 'fogproject'…
 remote: Enumerating objects: 123, done.
 remote: Counting objects: 100% (123/123), done.
 remote: Compressing objects: 100% (84/84), done.
 remote: Total 147049 (delta 73), reused 63 (delta 38), pack-reused 146926
 Receiving objects: 100% (147049/147049), 767.85 MiB | 2.50 MiB/s, done.
 Resolving deltas: 100% (104005/104005), done.
Navigate to cloned content and start the installation. To start the installation run the installfog.sh script. It may take another 5 to 10 minutes to complete the installation.
# cd fogproject/bin/
# ./installfog.sh
Installation Output for your reference. During the installation, multiple confirmations we need have entered to proceed with the setup. It includes
- What type of distribution setup we required ( 1) for Red Hat
- Fog Server installation mode, We using (Normal)
- Any changes need to be done for Interface with IP (N)
- Hostname confirmation (N)
- Configure Router Address for the DHCP server (192.168.107.2)
- Whether DHCP to handle DNS (N)
- Whether DHCP service needs to be enabled (Y)
- Any additional language packs required to install? (Y)
Finally, it will as for confirmation provide with Yes to continue. - Are you sure you wish to continue (Y/N) Y
During the installation, it will prompt for MYSQL provider (Y) - Is the MySQL password blank? (Y/n) Y
- Press [Enter] key when the database is updated/installed (Just Press enter)
During installation, it will download and install all required packages and dependencies. At last, we will get the login URL information with credentials. Below long output has been truncated.
[root@fog bin]# ./installfog.sh
 Installing LSB_Release as needed
 Attempting to get release information…………………..Done
 systemd
 Should the installer try to disable the local firewall for you now? (y/N)
 N
 You sure know what you are doing, just keep in mind we told you! :-)
 Hit ENTER so we know you've read this message.
 What version of Linux would you like to run the installation for?
   1) Redhat Based Linux (Redhat, CentOS, Mageia)   2) Debian Based Linux (Debian, Ubuntu, Kubuntu, Edubuntu)   3) Arch Linux
 Choice: [1] 1
 Starting Redhat based Installation
 FOG Server installation modes:
 Normal Server: (Choice N)
   This is the typical installation type and
   will install all FOG components for you on this
   machine.  Pick this option if you are unsure what to pick.
 Storage Node: (Choice S)
   This install mode will only install the software required
   to make this server act as a node in a storage group
 More information:
  http://www.fogproject.org/wiki/index.php?title=InstallationModes
 What type of installation would you like to do? [N/s (Normal/Storage)] Normal
 We found the following interfaces on your system:
 ens33 - 192.168.107.200/24
 Would you like to change the default network interface from ens33?
 If you are not sure, select No. [y/N] N
 Would you like to change the default hostname fog.linuxsysadmins.local?
 The fully qualified hostname is used for the webserver certificate.
 If you are not sure, select No. [y/N] N
 Would you like to setup a router address for the DHCP server? [Y/n] Y
 What is the IP address to be used for the router on
   the DHCP server? [192.168.107.2]
 Would you like DHCP to handle DNS? [Y/n] n
 Would you like to use the FOG server for DHCP service? [y/N] y
 This version of FOG has internationalization support, would
 you like to install the additional language packs? [y/N] y

 Here are the settings FOG will use:
 Base Linux: Redhat
 Detected Linux Distribution: CentOS Linux
 Interface: ens33
 Server IP Address: 192.168.107.200
 Server Subnet Mask: 255.255.255.0
 Server Hostname: fog.linuxsysadmins.local
 Installation Type: Normal Server
 Internationalization: 1
 Image Storage Location: /images
 Using FOG DHCP: Yes
 DHCP router Address: 192.168.107.2
 Are you sure you wish to continue (Y/N) Y
 Installation Started
 Testing internet connection……………………………Done
 Adding repository if needed……………………………OK
 Preparing Package Manager……………………………..OK
 Packages to be installed:
 bc curl dhcp gcc gcc-c++ genisoimage gettext gzip httpd lftp m4 make mod_ssl mtools mysql mysql-server net-tools nfs-utils php php-bcmath php-cli php-common php-fpm php-gd php-ldap php-mbstring php-mysqlnd php-process syslinux tar tftp-server unzip vsftpd wget xinetd xz-devel
 Skipping package:   bc………………………………..(Already Installed)
 Skipping package:   curl………………………………(Already Installed)
 Installing package: dhcp………………………………OK
 Installing package: gcc……………………………….OK
 Installing package: gcc-c++……………………………OK
 Installing package: genisoimage………………………..OK

 Is the MySQL password blank? (Y/n) Y
 Setting up and starting MySQL………………………….Done
 Backing up user reports……………………………….Done
 Stopping web service………………………………….OK

 You still need to install/update your database schema.
 This can be done by opening a web browser and going to:
 http://192.168.107.200/fog/management
 Press [Enter] key when database is updated/installed.

 Ensuring node username and passwords match………………Done
 Setup complete
 You can now login to the FOG Management Portal using
 the information listed below.  The login information
 is only if this is the first install.
 This can be done by opening a web browser and going to:
 http://192.168.107.200/fog/management
 Default User Information
 Username: fog
 Password: password
 [root@fog bin]#
Customize the Service to start bit delay
Disable the services and follow with creating below rc.local script.
# systemctl disable FOG{MulticastManager,Scheduler,SnapinReplicator,ImageReplicator}
# systemctl disable nfs-server
# systemctl disable rpcbind
Delay the service to start by 30 seconds during the reboot, Create a rc.local.
# touch /etc/rc.d/rc.local
# chmod +x /etc/rc.d/rc.local
# vi /etc/rc.d/rc.local
Append with below start commands under rc.local.
!/bin/bash
 sleep 30
 touch /var/lock/subsys/local
 systemctl start nfs-server
 systemctl start rpcbind
 systemctl start FOGMulticastManager
 systemctl start FOGScheduler
 systemctl start FOGSnapinReplicator
 systemctl start FOGImageReplicator
 exit 0
Accessing Web UI after the Installation
Fire-up anyone of web browser and navigate to http://192.168.107.200/fog/management this can be FQDN or IP.
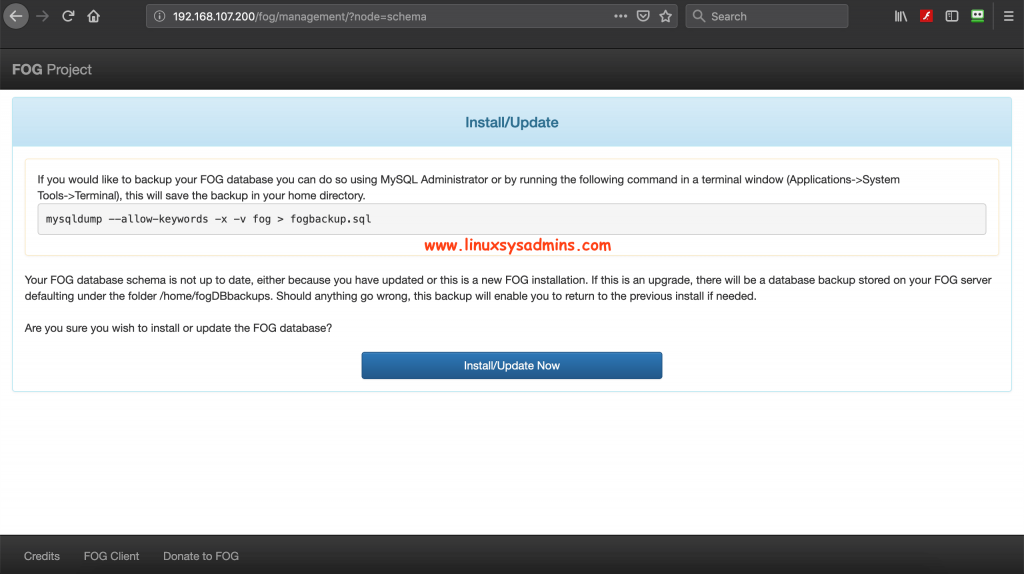
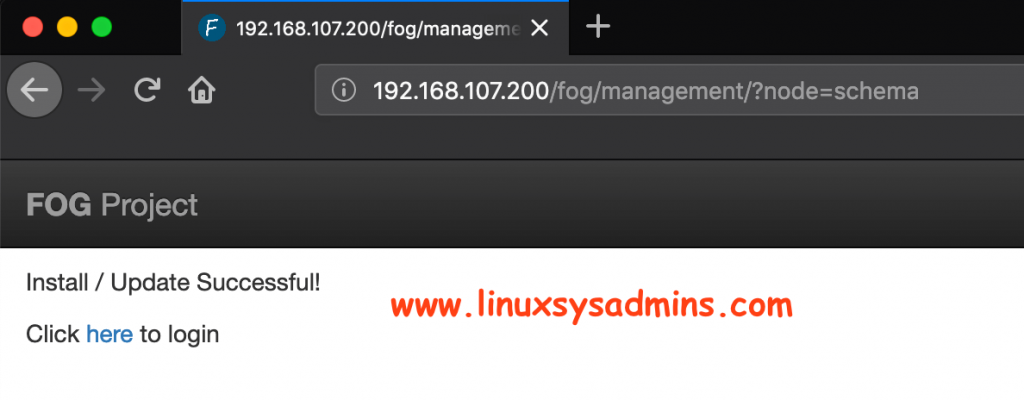
Once Schema update completed we will get the login prompt.
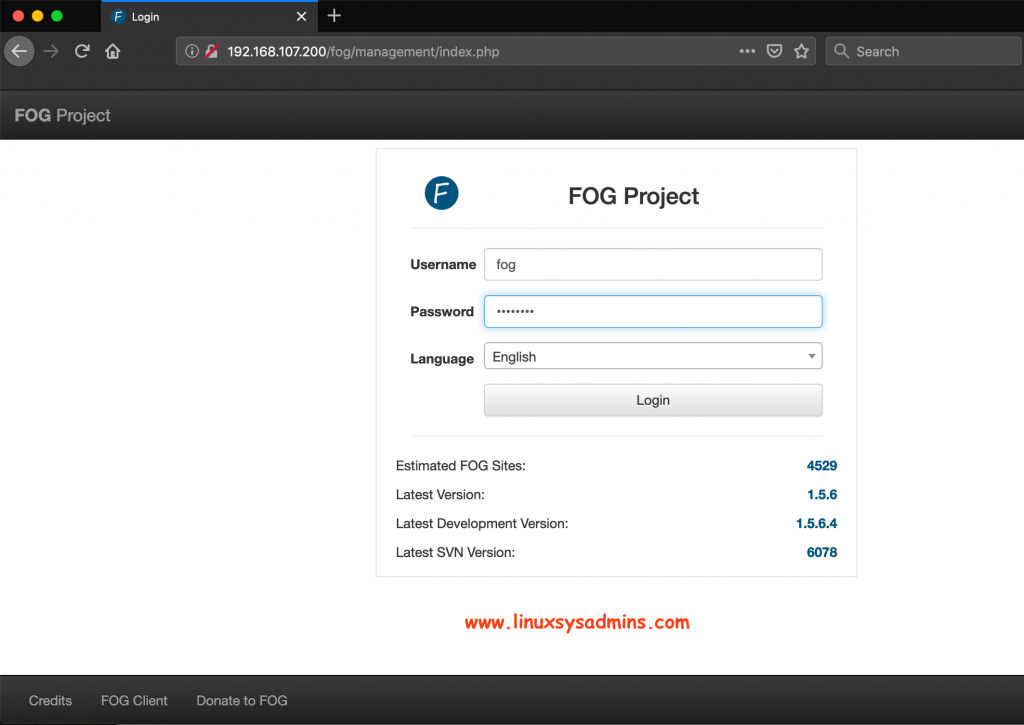
We will be taken to login prompt as shown below.
After login, it will take us to the Dashboard

That’s it, we have successfully installed Fog server to start the imaging for Linux, Windows and Mac OSx.
Conclusion
We have walkthrough setup guide of FOG server in our later guides will cover with more articles related to it until then subscribe to our newsletter to receive the update.
Hello,
How to change the hostname while deploying the ubuntu image?
or
Is it possible to change the hostname while deploying the Ubuntu image? without post script