Table of Contents
Introduction
Oracle Linux 8 Installation steps are similar to Oracle Linux 7. The guide created by focusing on new Linux users. Let’s go through step by step installation guide with screenshots.
Features in Oracle Linux 8
To read about the features of Oracle Linux 8 find all information under the oracle blog.
Oracle ISO can be downloaded from edelivery website Download URL make sure to create an account with your Personal or Enterprise email ID.
Refer all RPM-based Operating system installation guides
- Step by step Oracle Linux 7.4 Installation guide with screenshots
- Installing Red Hat Enterprise Linux 8.0 with screenshots
- Red Hat Enterprise Linux 7.x Installation guide with screenshots
- Step by step Cent-OS Linux 7.5 Installation guide with screenshots
- Step by step Scientific Linux 7.5 Installation guide with screenshots
Booting from Oracle Linux 8 DVD/ISO
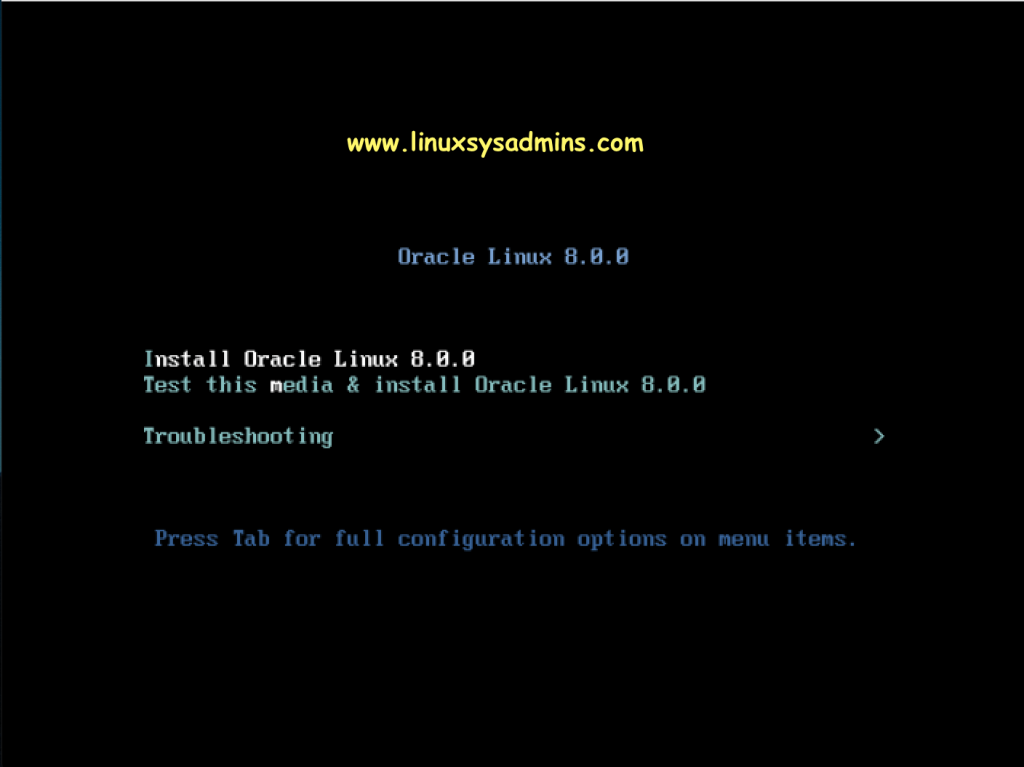
Boot from the DVD/ISO file to start the installation. Choose “Install Oracle Linux 8.0.0” to start the installation.
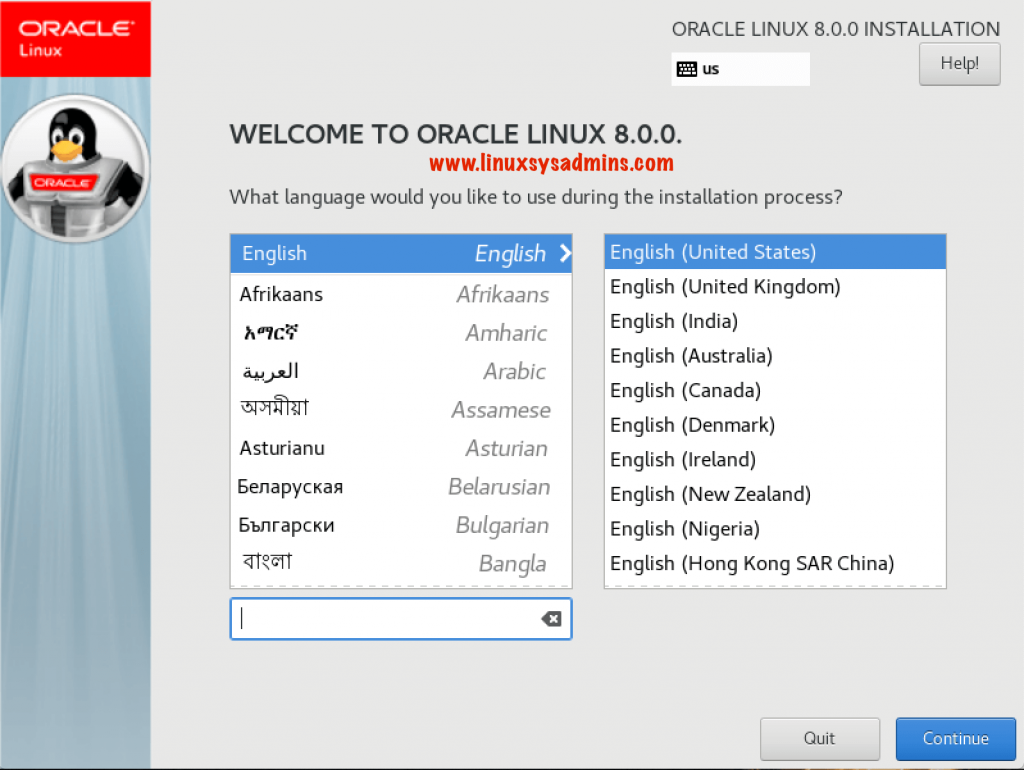
Installation Language Selection
Choose the language to perform the installation. The system-level language selection will apply only for the installation process. Click “Continue” to move forward.
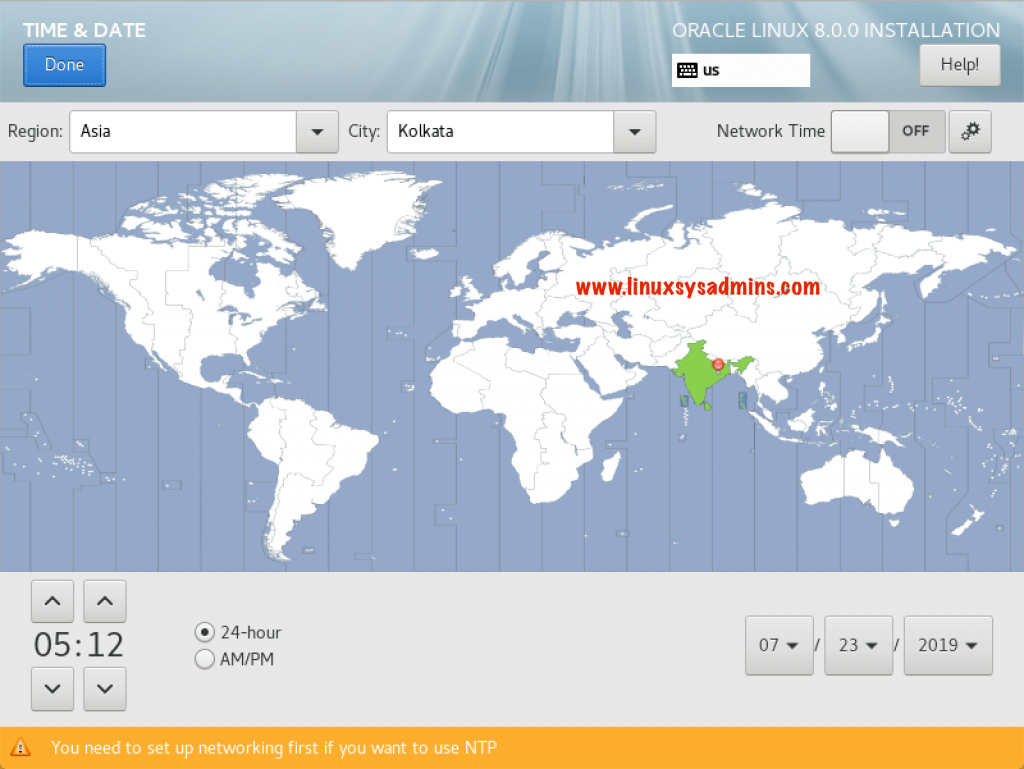
Choosing Time Zone
The default timezone will be America\xxxx change it to your applicable timezone and click “Done“.
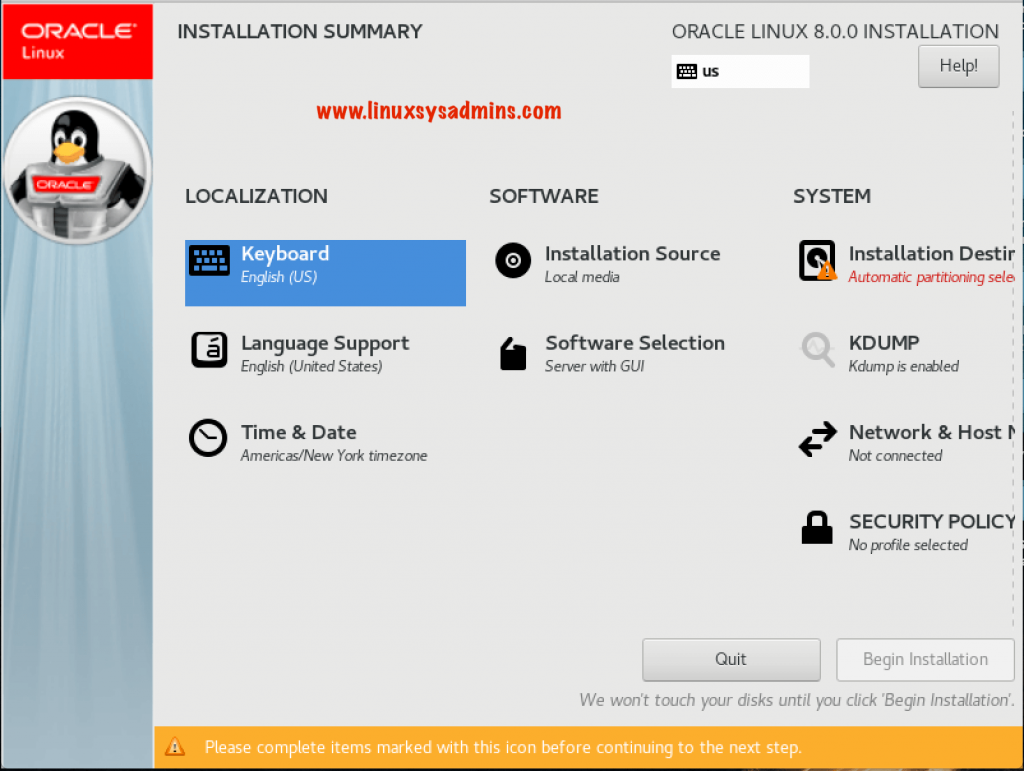
You will be taken to the Installation Summary screen as shown below.
Oracle Linux 8 Installation Summary Screen
Click on anyone to start the required installation configuration.
Software Selection
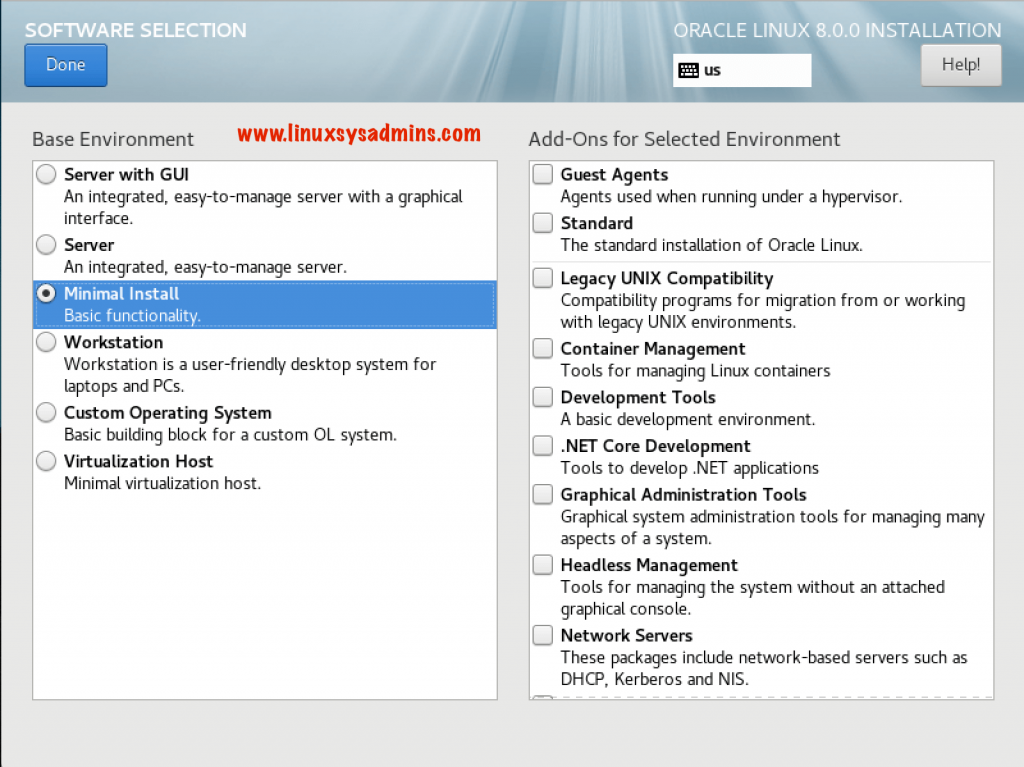
By Clicking on “Software Selection” select the Minimal install radio button to install with a lightweight operating system with basic functionality. Click “Done” to confirm and go back to Summary screen.
Define Partitions
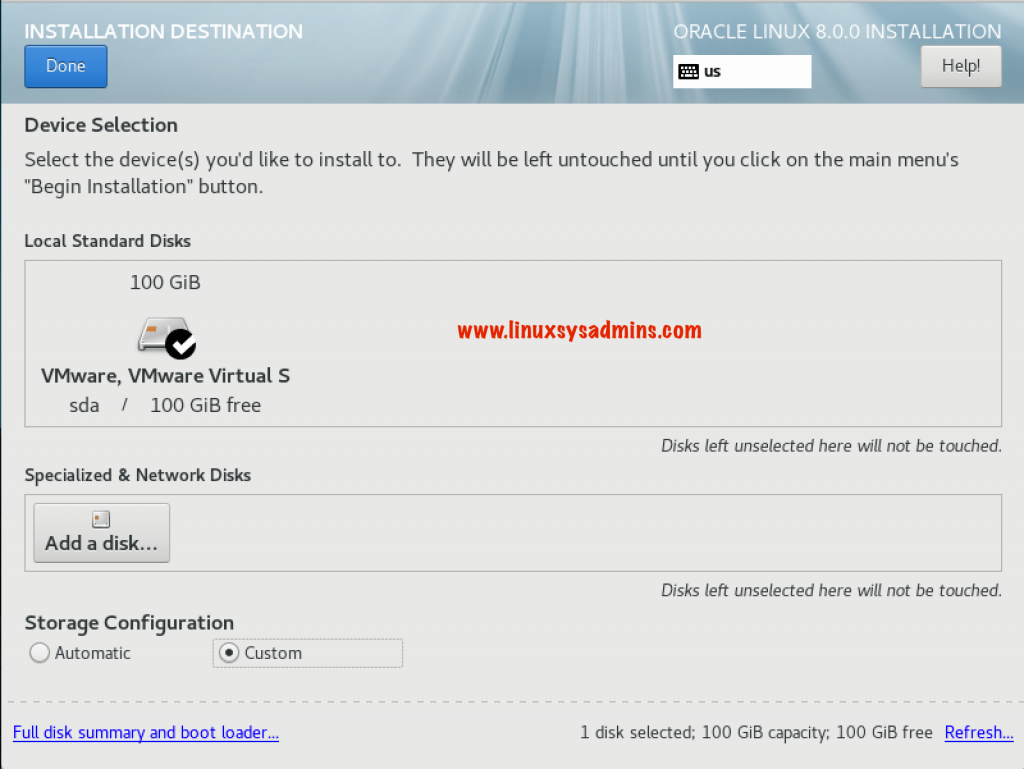
Again from Summary screen select the “Installation Destination” to start to configure the partition and click “Done“.
Create /boot Disk
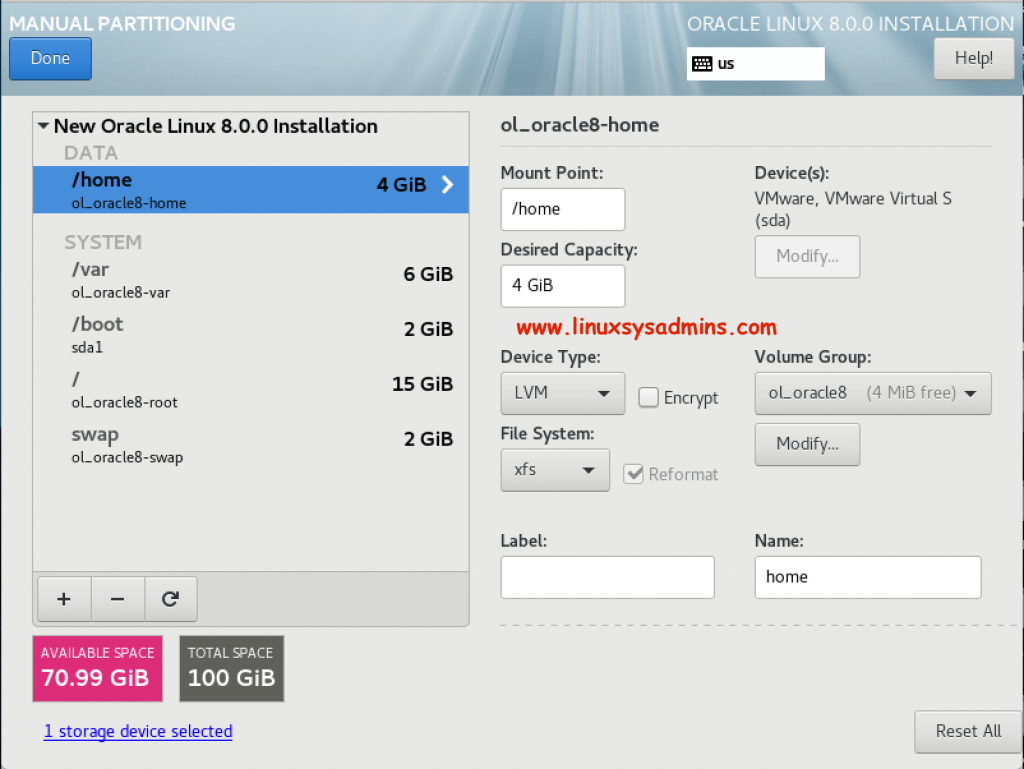
First, create the /boot file system with a minimum of 1 GB in size.
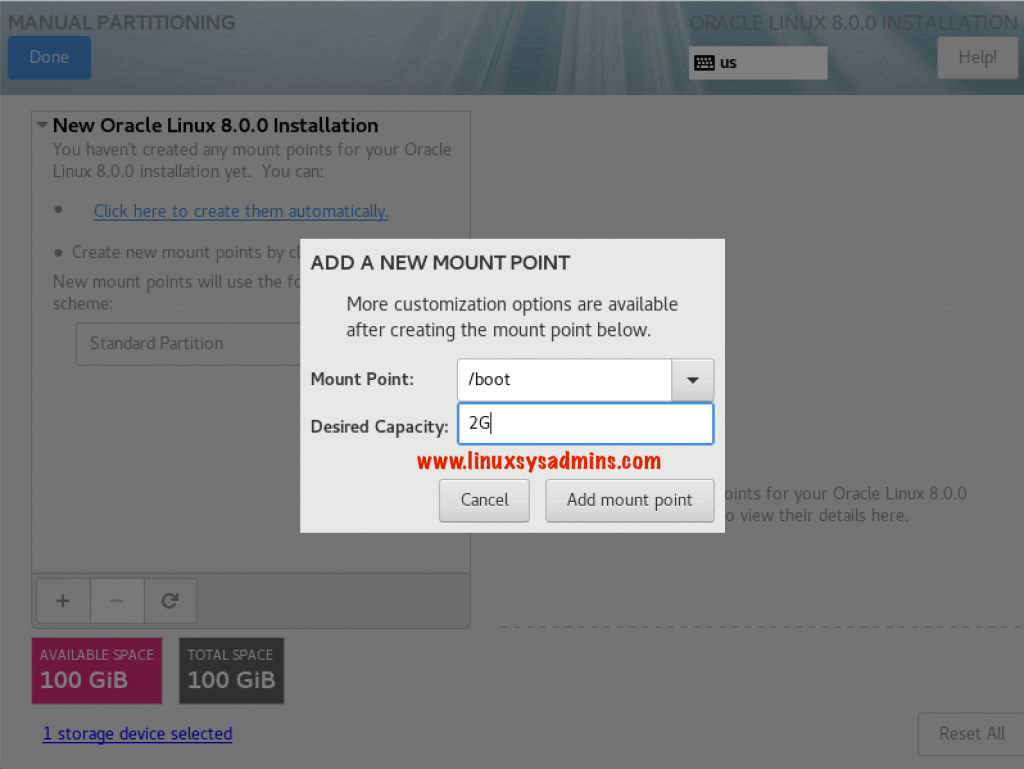
Make sure to choose EXT4 or XFS as your /boot partition file system. The partition type can be standard, after the partitioning it will be /dev/sda1.
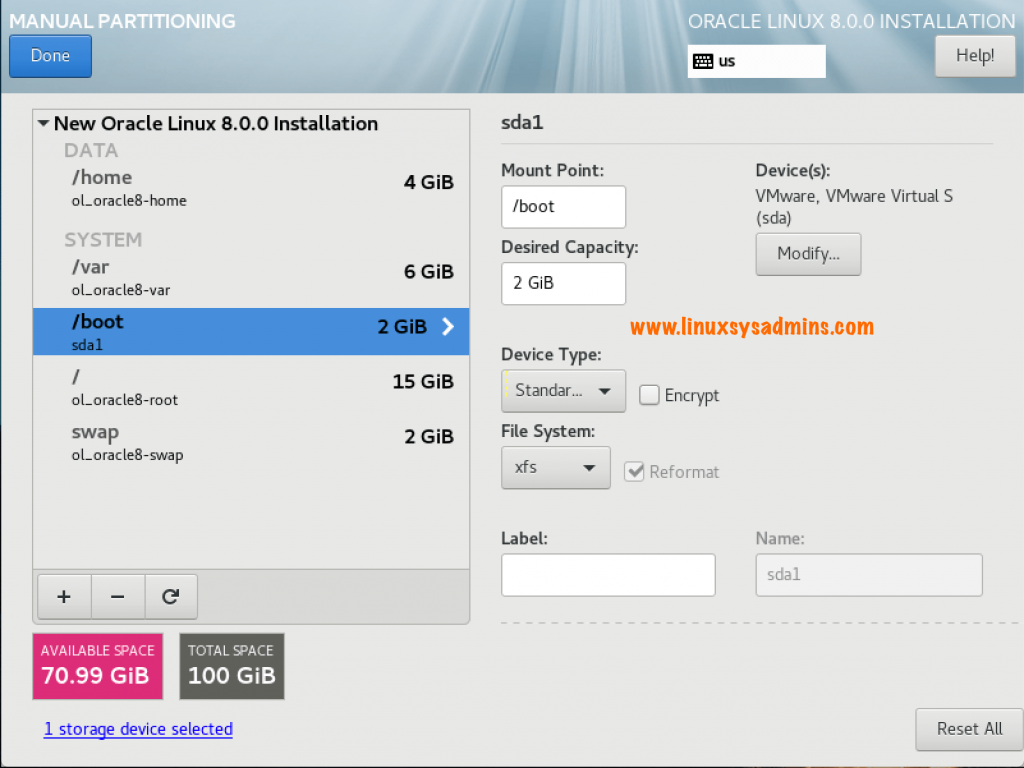
Remaining file System can be under logical volume. Choose the Device Type as LVM and file System as XFS.
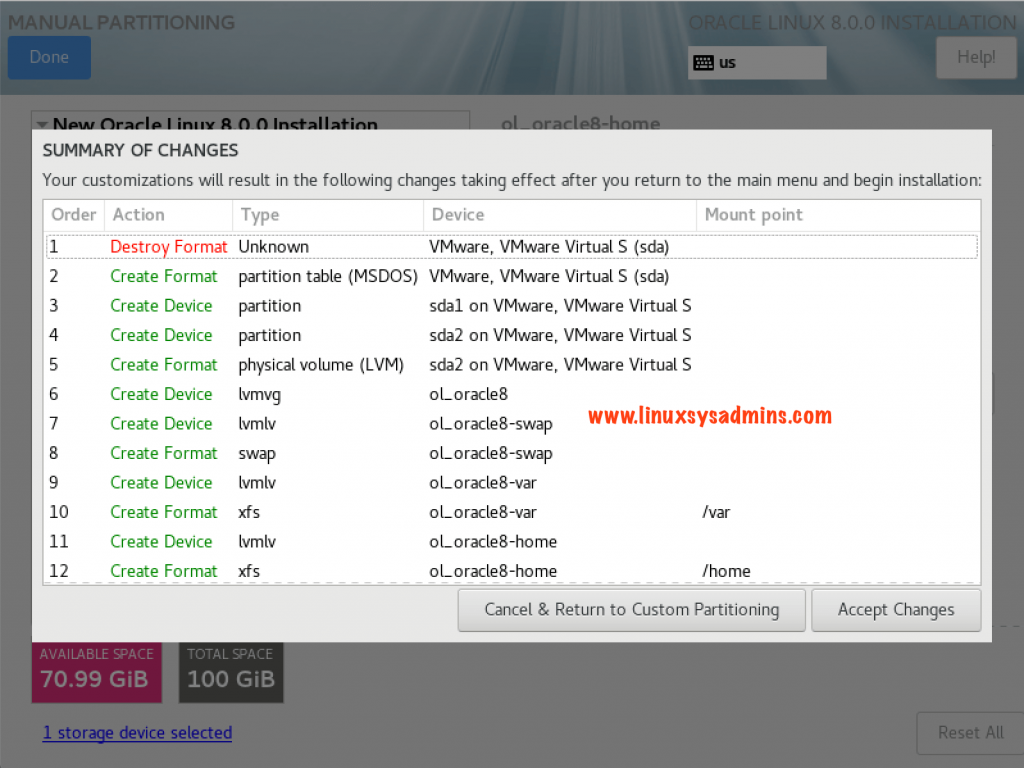
In the next window, we will get a summary of the defined partition changes. It will prompt to confirm the changes. By clicking on “Accept Changes” the partitions will be created.
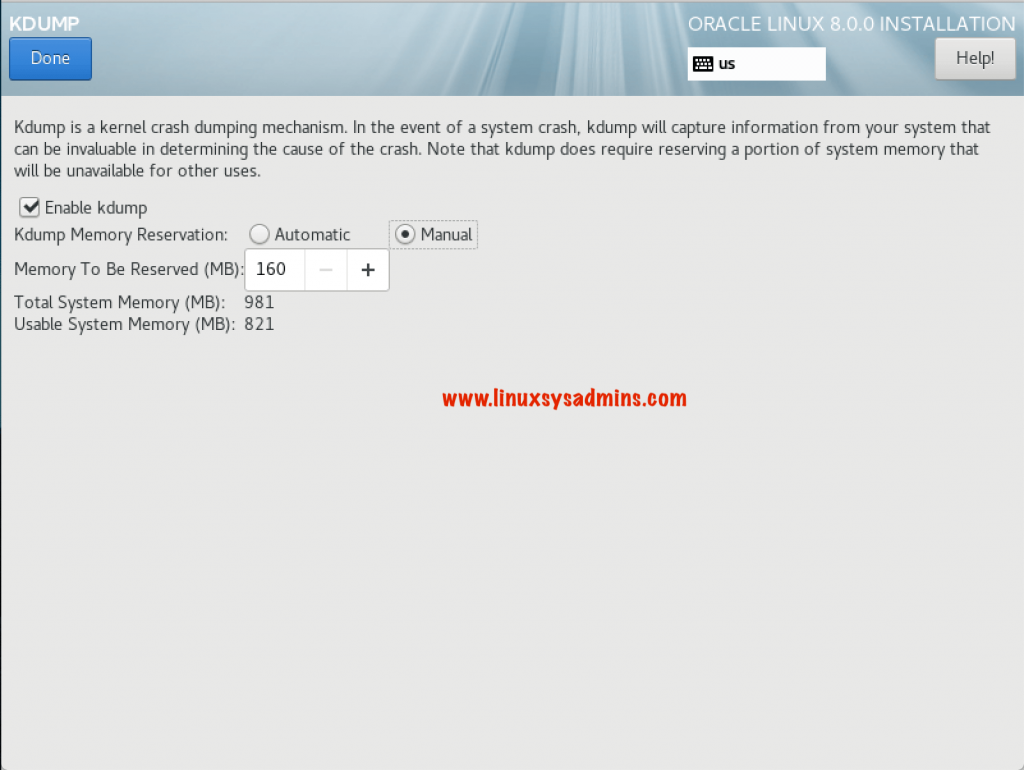
Kdump Configuration
It’s worth to gather as much possible information by configuring the memory.
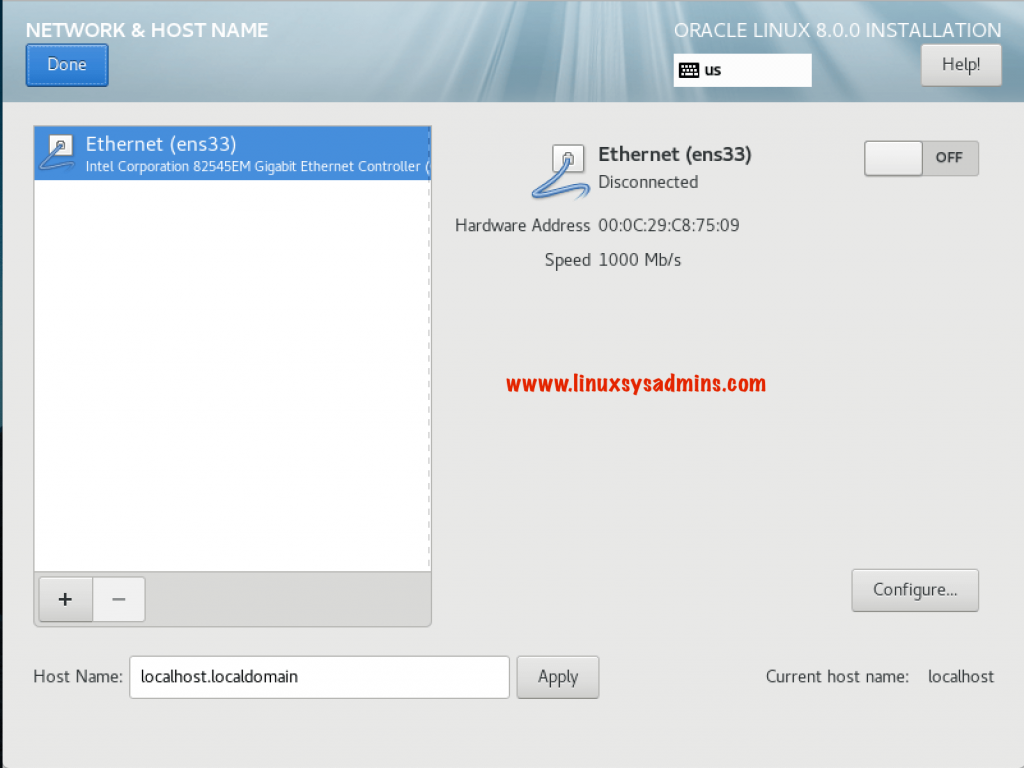
Network Configuration
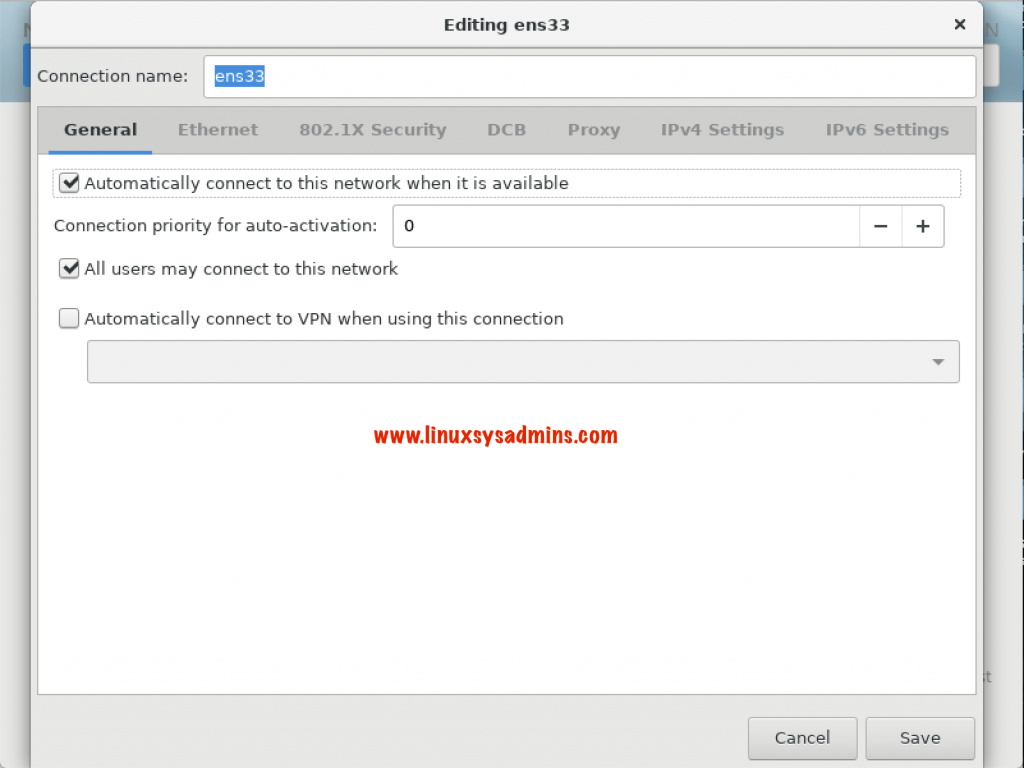
Click “Configure” to edit the network configurations.
To bring up the network on boot time and assign with an IP from DHCP check the box next to Automatically connect.
Click “Save” to exit from network configuration.
To configure static IP click on IPv4 Settings Tab and start with configuring static IP. In our setup, we are using DHCP to assign an IP.
Click the ON/OFF button in right side top corner to activate the interface. The IP information shown in snip is getting from DHCP.
Set a Hostname at the bottom and click “Apply” to set the persistent hostname.
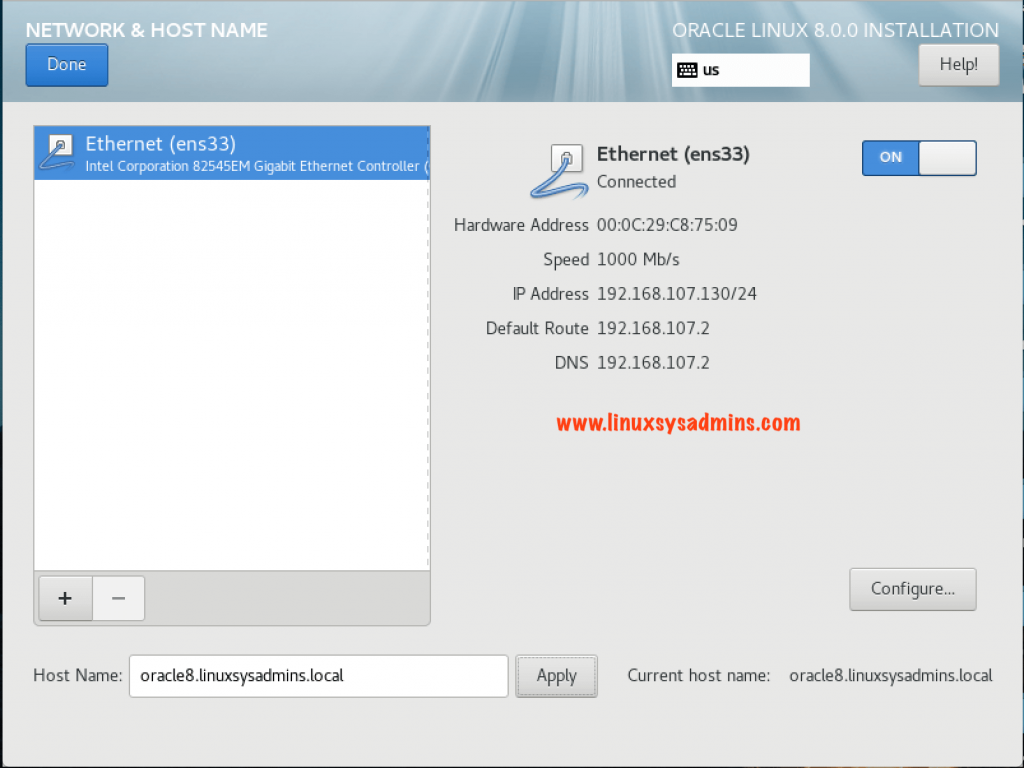
Click “Done” to exit from network configuration.
Back to Installation Summary screen
After configuring the required settings take back to Summary.
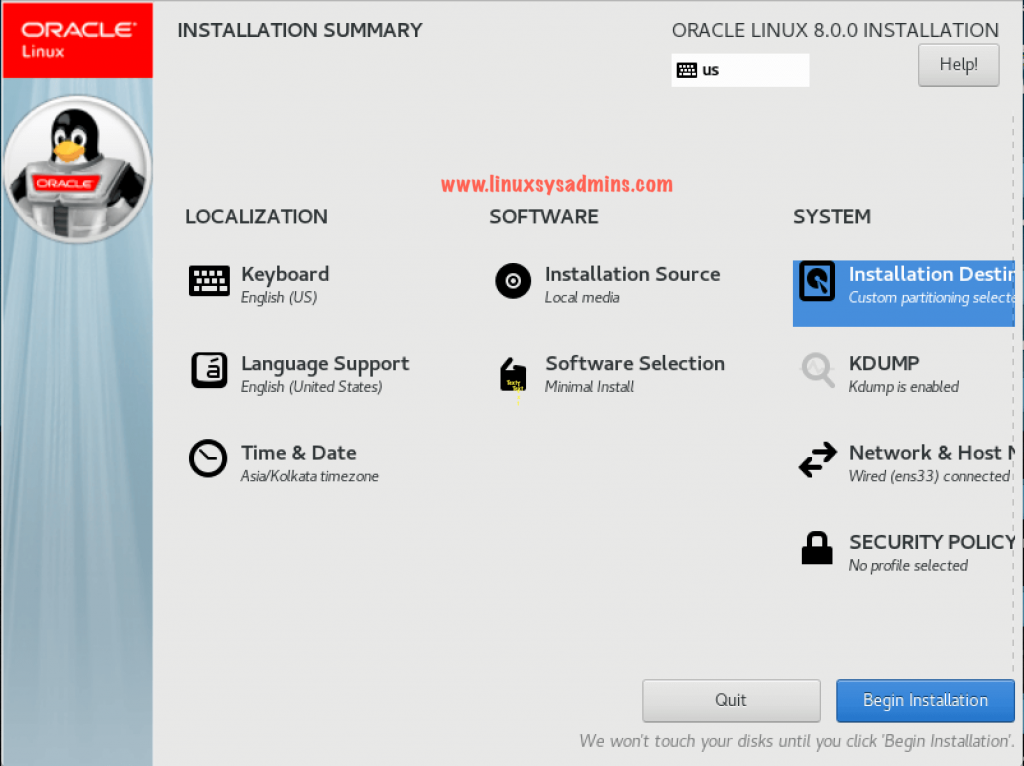
Click “Begin Installation” to start copying files and installing the Operating System.
Set Root Password
The installer will start to copy/install package. Click “Root Password” to set the root password.
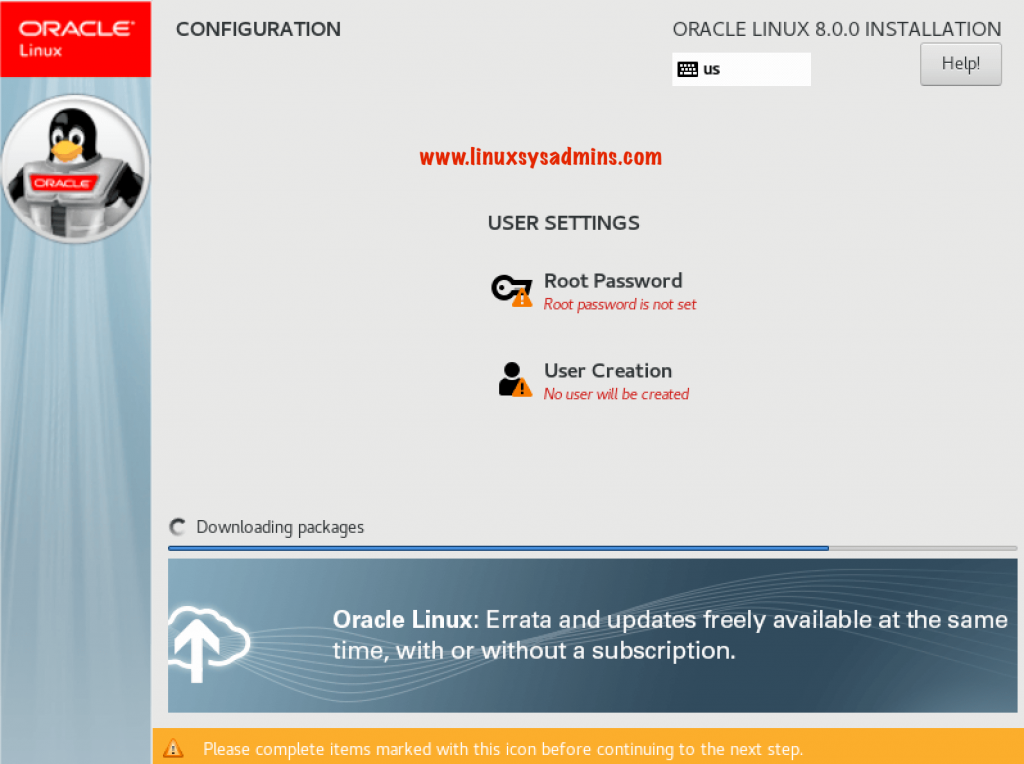
Create the Root password, make sure to use a complex password by avoiding any dictionary password.
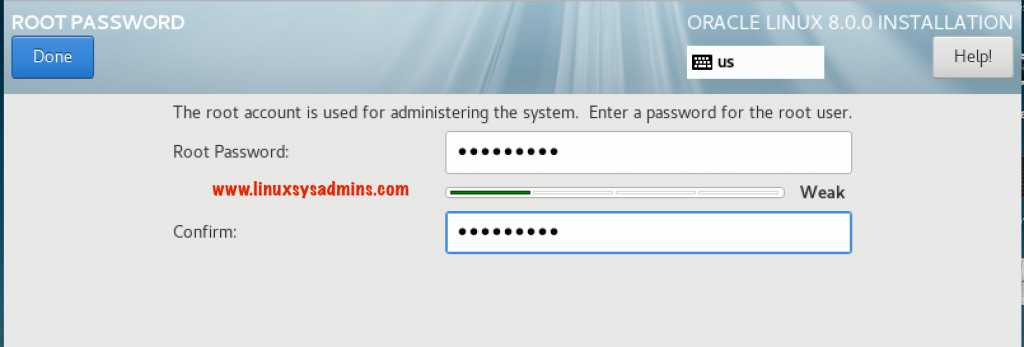
To exit from root password set window click on “Done“.
Create a Privileged account
Apart from the root account, we can create anyone of the normal user account with privilege (sudo) or without privilege.
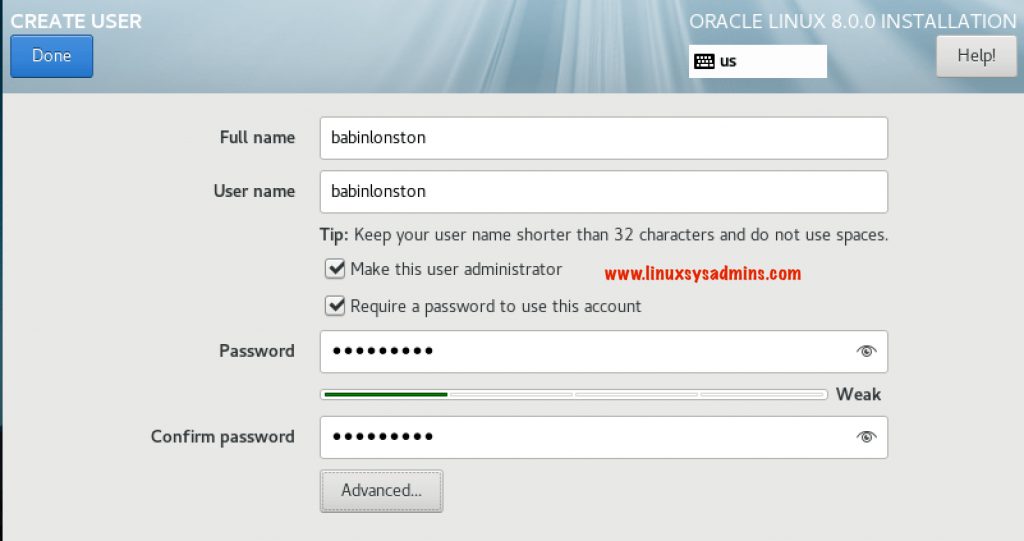
Click “Done” to create the user account.
Installation in Progress
Now it’s time to wait for the installation to complete. The time for installation to complete depends on what type of Software selection you have selected in the previous step.
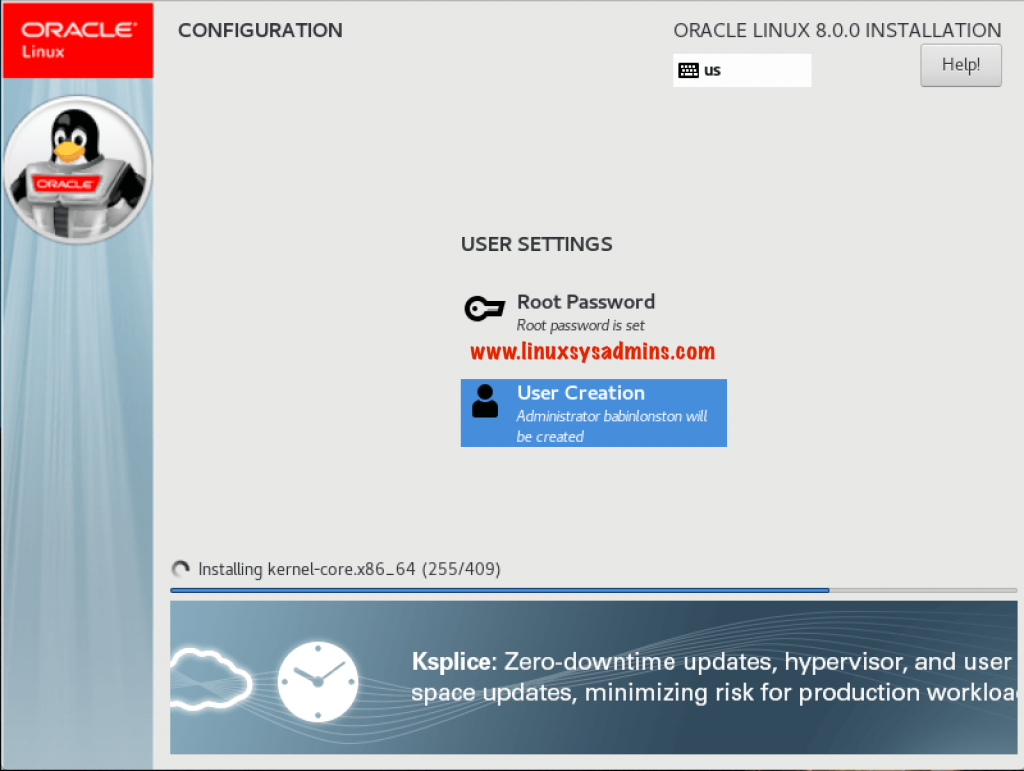
Reboot after Installation
It may take a few minutes to install and configure the installation. Click “Reboot” at bottom of the window to complete the Installation.
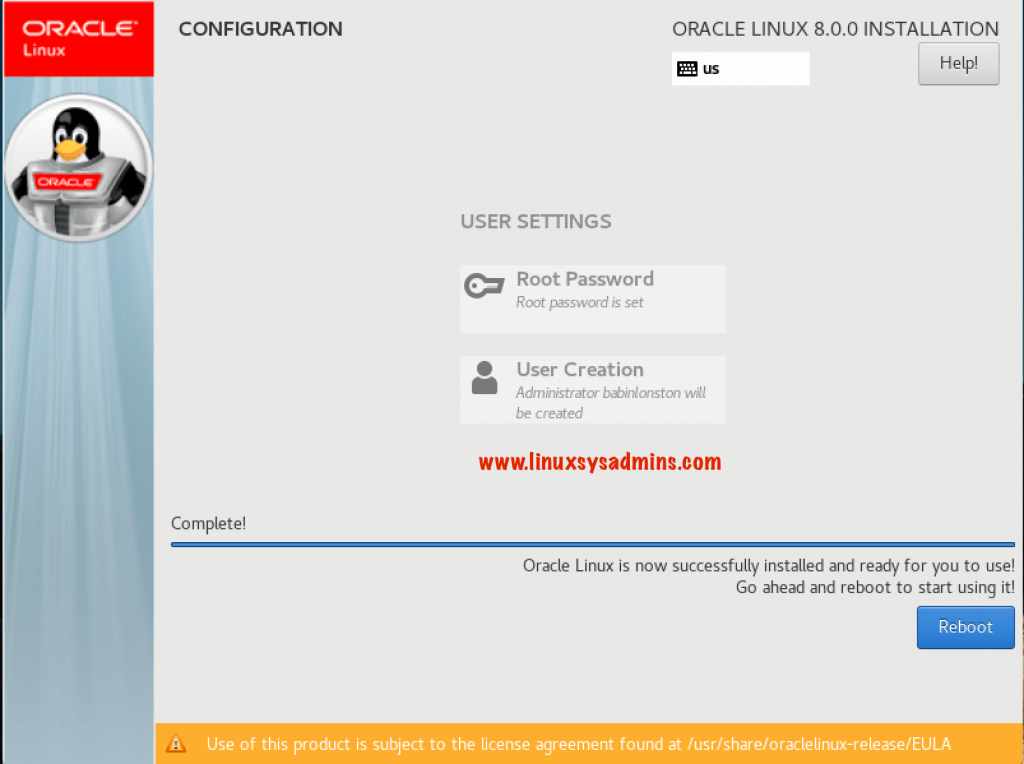
Eject the media or ISO, We have successfully installed with Oracle Linux 8.
After Installation
The server will hardly take 30 Seconds to 1 min to come online. Physical servers may take 4 to 10 mins to come online.
Login to root account and verify the version and run a few basic commands.
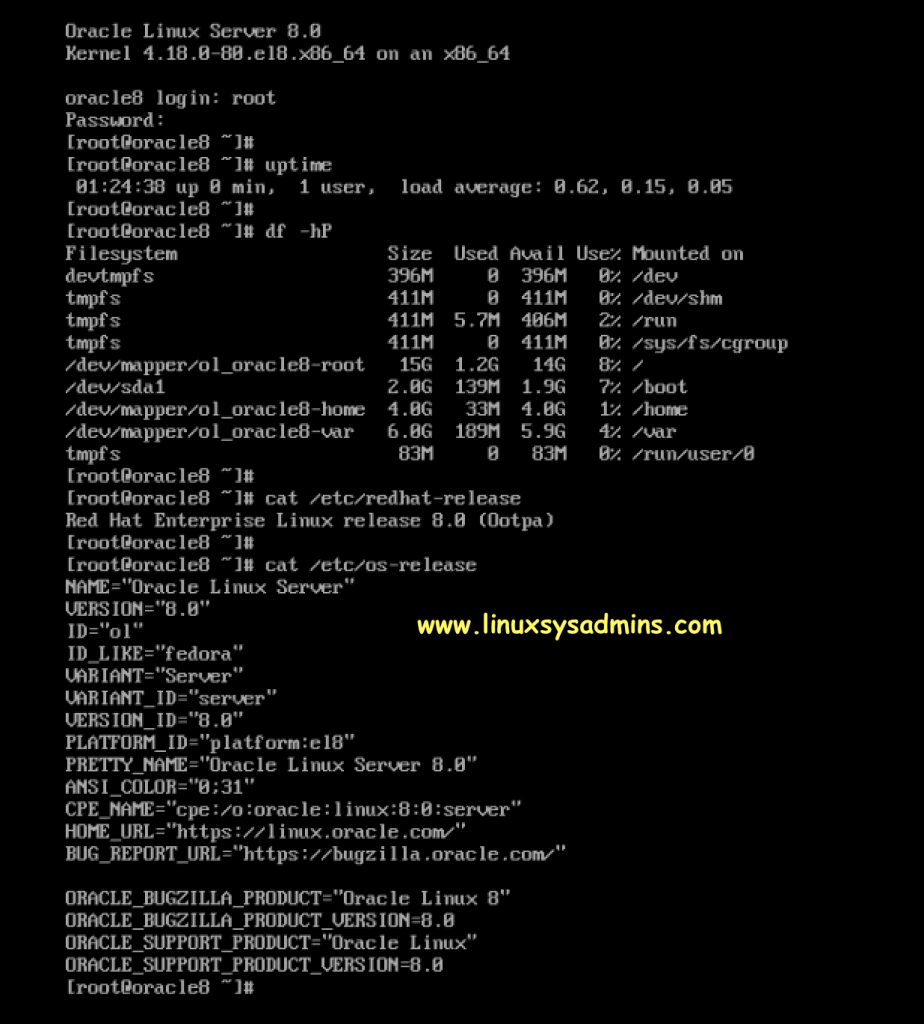
Without a subscription, Oracle Server can connect with public Yum repo. Bu default installation this will be in place and not required to configure. You can verify by running Yum commands. Or learn how to use new Yum with module features.

That’s it we have successfully completed with a basic Oracle Linux 8 Server on a Virtual machine or Physical server.
Conclusion
A basic Oracle Linux 8 Installation has been carried out with step by step guide. Provide your feedback in below comment section and subscribe to our newsletter to stay with us.