Table of Contents
Introduction
Kubernetes Cluster with Rancher, In today’s guide, let us set up a Kubernetes Cluster with Rancher by running a few commands in a little span of time.
In our earlier write-up, we have gone through step by step guide about starting with Kubernetes installation. However, to up and run a Kubernetes cluster in a few minutes is also possible using Rancher. It is an OpenSource product simplify the management of Kubernetes cluster. It is just a web User Interface to manage the Kubernetes cluster.
To start the setup you need to be familiar with Docker commands. Just pull the image and launch the container in a few seconds.
Our Demonstration Setup
We are using 3 numbers of CentOS 7.6. One server will be used for running Rancher container and another two will act as nodes.
1 GB Memory for each server.
1 vCPU as well.
If you are playing with it on your Laptop or Desktop, Make sure to have enough resources at least a minimum of 6 GB available memory and 4 cores. While scaling the cluster Up/Down you may hit with the performance.
Operating System and Docker Setup
Before starting with the setup make sure to have a minimal installation of Linux server ready. By following resolve few of dependencies by installing Docker before starting with Rancher.
The Operating System we are using in our guide is CentOS 7.6
[root@sysadmins ~]# cat /etc/redhat-release
 CentOS Linux release 7.6.1810 (Core)
[root@sysadmins ~]#
Once Docker installed we are good to start with our setup.
[root@sysadmins ~]# docker -v
 Docker version 19.03.2, build 6a30dfc
[root@sysadmins ~]#
Start with Setting up
Start to pull down the image, You can find the image in Docker Hub.
https://hub.docker.com/r/rancher/rancherDownload the image and start the container.
# sudo docker run --name Rancher_K8s -d --restart=unless-stopped -p 80:80 -p 443:443 rancher/rancherOr run above command to download, start and expose the network of the container.
[root@sysadmins ~]# sudo docker run --name Rancher_K8s -d --restart=unless-stopped -p 80:80 -p 443:443 rancher/rancher
 latest: Pulling from rancher/rancher
 35c102085707: Pull complete
 251f5509d51d: Pull complete
 8e829fe70a46: Pull complete
 6001e1789921: Pull complete
 190724123869: Pull complete
 f144ec07b677: Pull complete
 eb837ce35a44: Pull complete
 71ab38270b07: Pull complete
 d69cad2e554a: Pull complete
 33d6cdb7458b: Pull complete
 f5a0fc4d0fec: Pull complete
 2bd480581d18: Pull complete
 d81d5f05f9e8: Pull complete
 Digest: sha256:b85f1dd239d2555ef438f46790642334e0c75f314a35047b93acb1b457b4cd09
 Status: Downloaded newer image for rancher/rancher:latest
 039de48d12e3e2fd226eb456c6ce1b701db409a818f53b2fde8198bba9ca6544
[root@sysadmins ~]#
That’s it, now we are up and running with Kubernetes GUI.
[root@sysadmins ~]# docker ps
 CONTAINER ID        IMAGE               COMMAND             CREATED             STATUS              PORTS                                      NAMES
 039de48d12e3        rancher/rancher     "entrypoint.sh"     51 seconds ago      Up 49 seconds       0.0.0.0:80->80/tcp, 0.0.0.0:443->443/tcp   Rancher_K8s
[root@sysadmins ~]#
Next, its time to access it from any one of the web browsers.
Accessing Rancher GUI
Once Rancher container Up and running, access the URL and create your password for default account admin. Type your own defined password and click Continue to set the password.
https://192.168.107.100/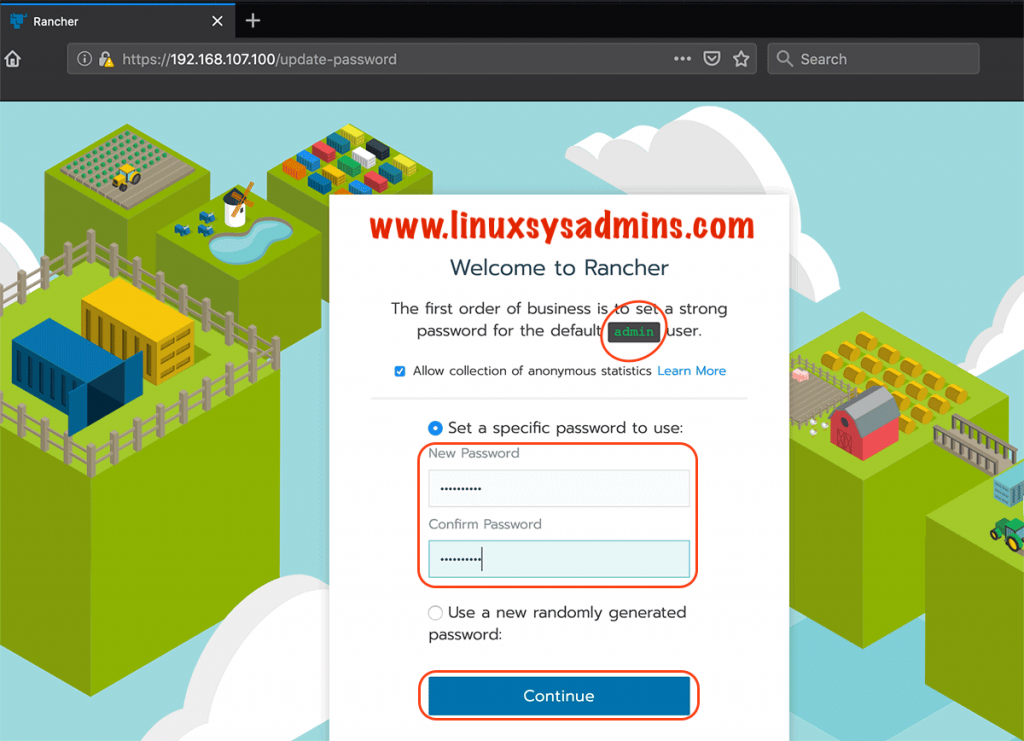
By following it will be redirected to set the Server URL. In our case, we are using our server IP address as shown in the below figure.
192.168.107.100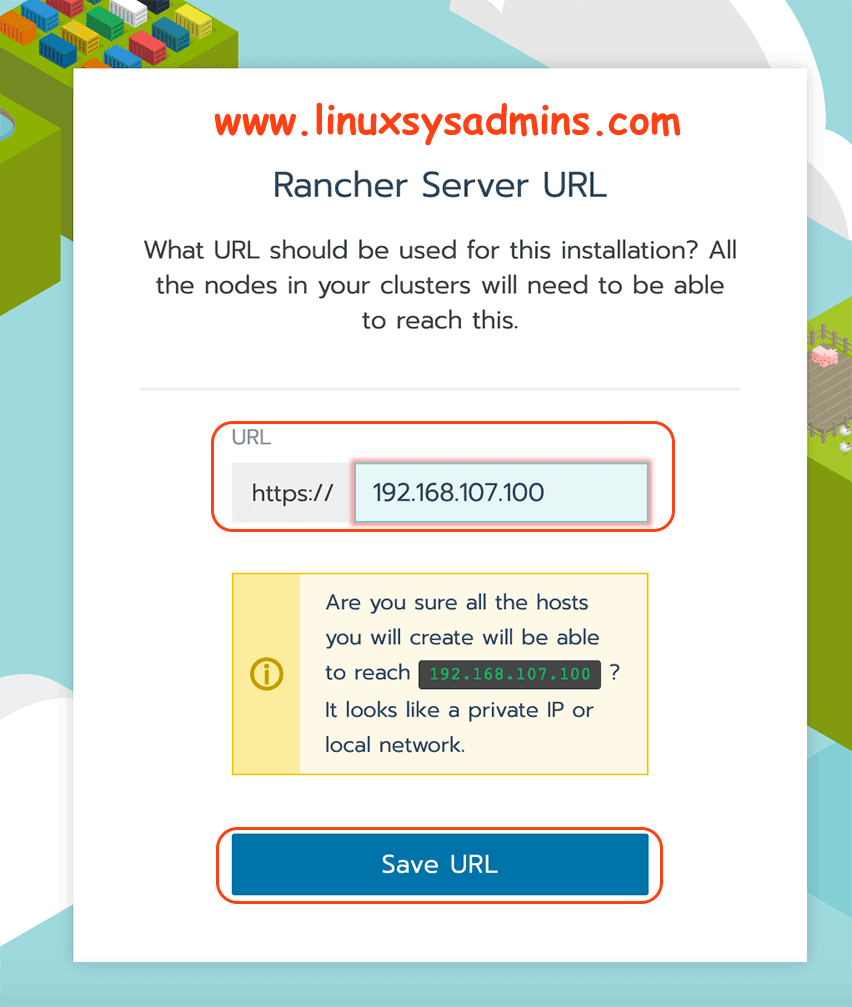
After completing with the initial one-time configuration we will be redirected to a dashboard as shown below.
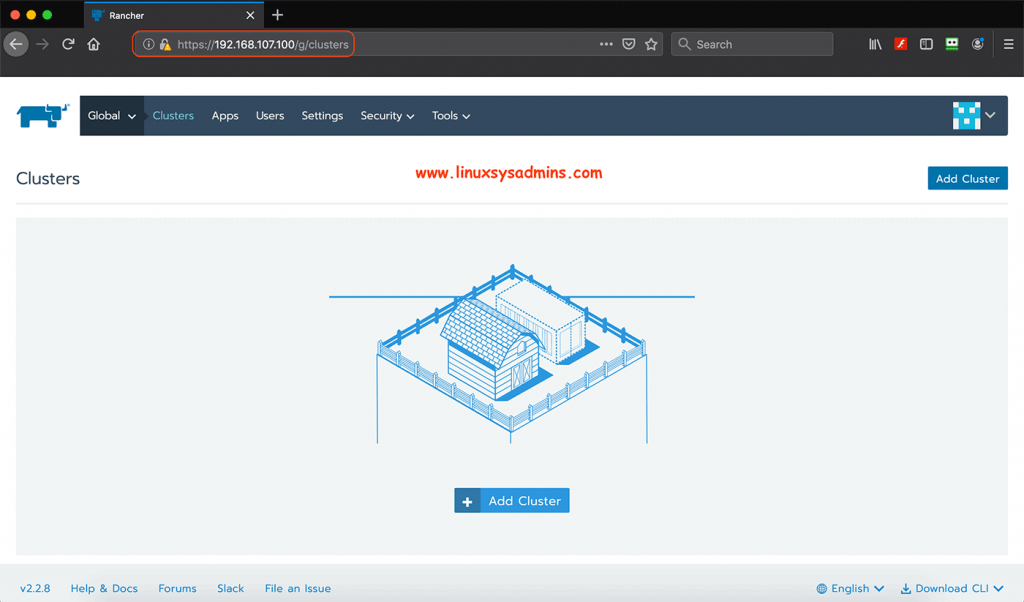
For demonstration purpose let’s create a cluster.
Creating a New User
Let’s start with creating a user. Click on top menu Users, by the following click on Add User to create a new user.

Enter the details for the user account
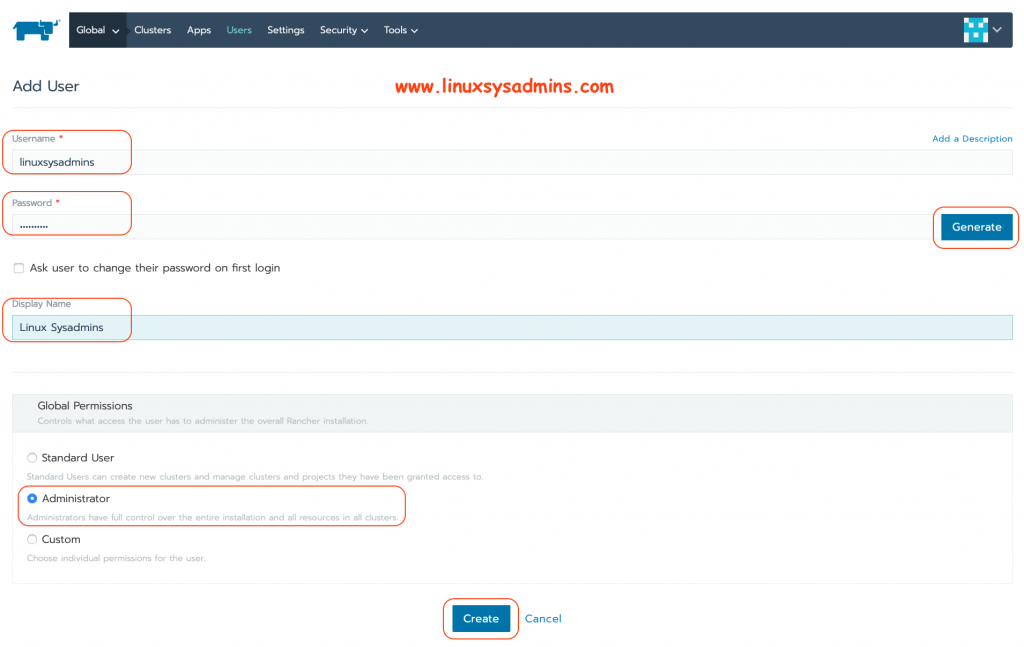
- Username about to create
- Password for the user account
- The name to display for the respective user account.
- Which account privilege need to be assigned for the user account.
Finally, click Create.

For demonstration purpose, we have chosen global permission as “Administrator“. But make sure to choose the write privilege while you create for a production.
Creating our first Cluster
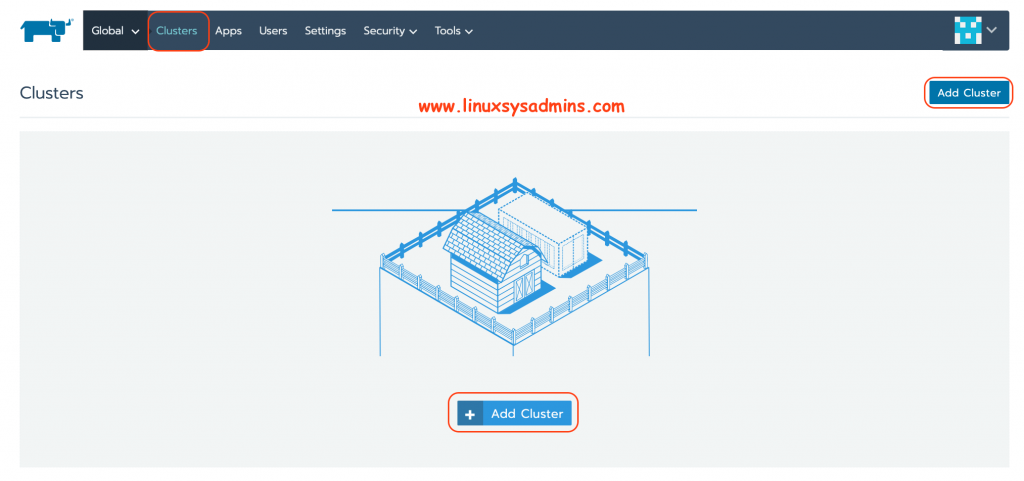
Let us create a Cluster now. Click Add Cluster
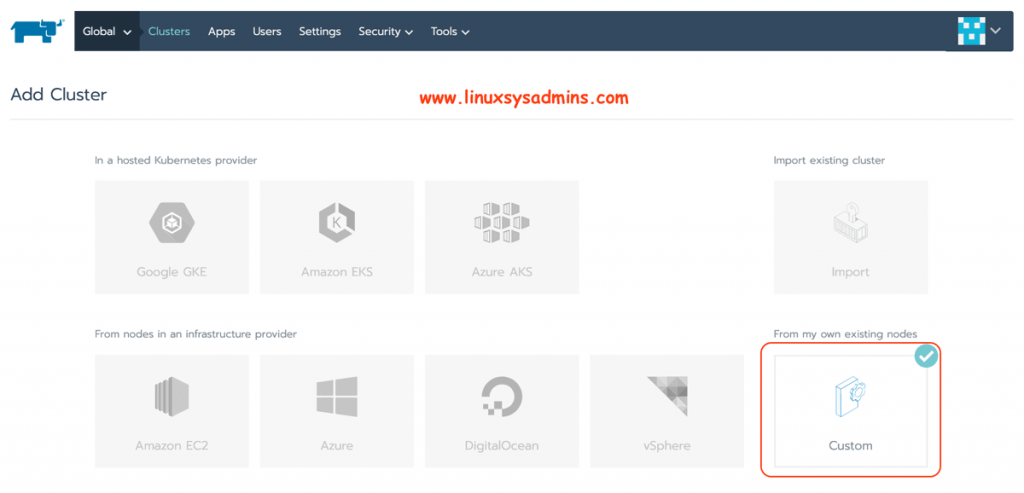
Right now we working only with the custom option. Select “Custom“.
If you need to set up a Kubernetes cluster on anyone of a provider like Google, Azure, Amazon selects the respective provider.
Give the required information to create the cluster.
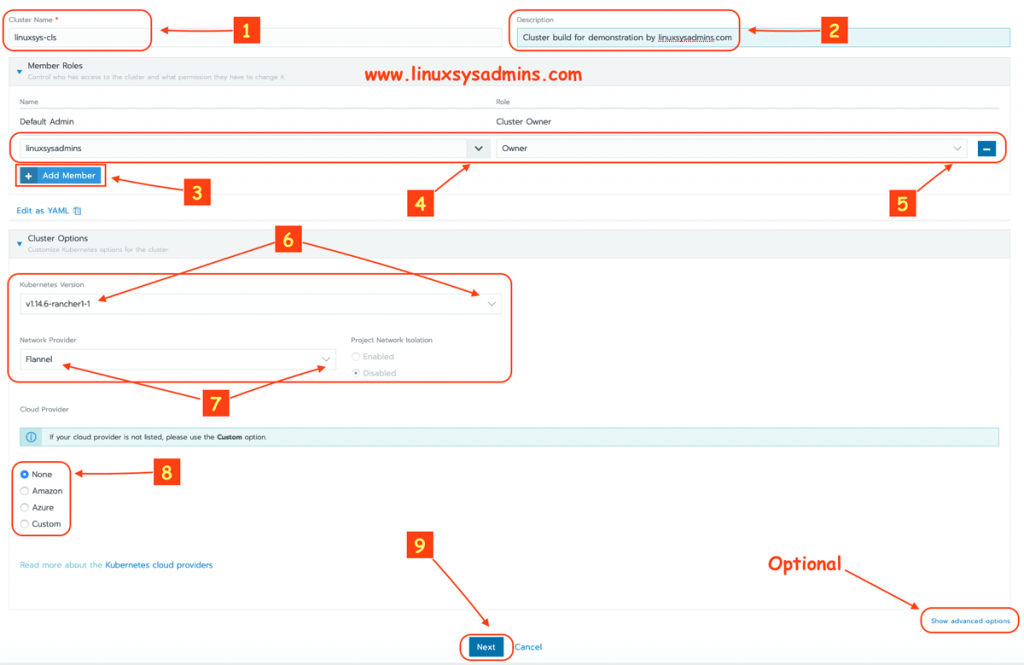
- Name of the cluster (linuxsys-cls) we are about to create.
- A small description of your cluster.
- Click to add the user.
- Select the created user from the drop-down list or search for the name.
- Provide permission to the user how he has the privilege over this cluster.
- Choose the Kubernetes version by click on the drop-down list.
- Pick the required network provider from the drop-down list.
- As we are not using any provider choose none.
- Proceed with Next to continue the setup.
Optionally we can use more options by clicking on “Show advanced options“.
Adding Nodes (Clients)
Under node select all the options.
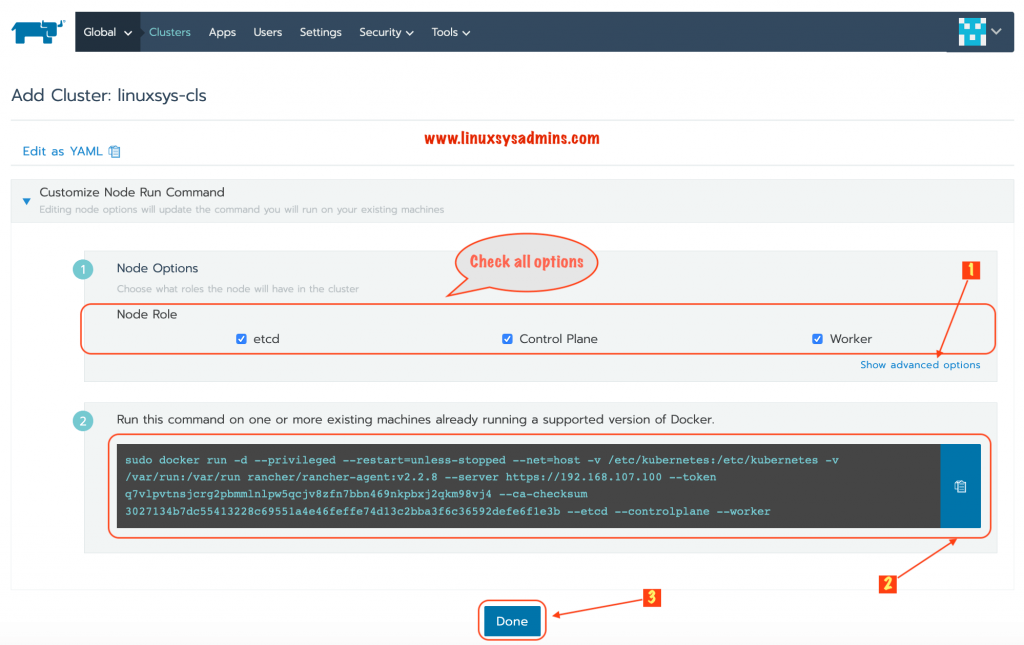
- If you need to assign with Internal and external address click “Show advanced options”.
- Click to copy the command and paste on all worker nodes. Once they complete with run the docker setup the proceed with done.
- As above mentioned once complete with docker command-click on Done.
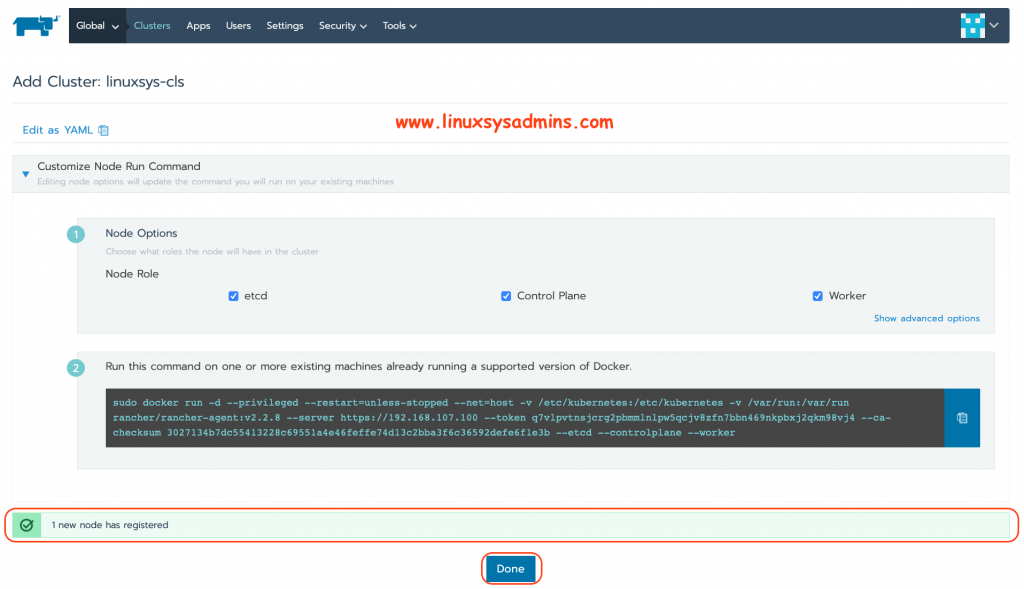
Once the docker command completed we will get noticed as “1 new node has registered“. Once confirmed click done.

We should notice the cluster status will change to Provisioning. At this stage, it will take a few minutes to complete with setup. During this progress, the required docker images will be downloaded on worker nodes and it will start to set up the cluster.

Finally, we are good with cluster status as shown “Active”.
- Status of Cluster
- Name of the cluster.
- The provider we selected.
- The number of worker nodes.
- Current utilized CPU and total available CPU in our cluster.
- Utilized memory and available memory across the cluster.
- Click to get more options like edit, delete etc.
Once the cluster up and running we should get two projects under our cluster in the name Default and System.
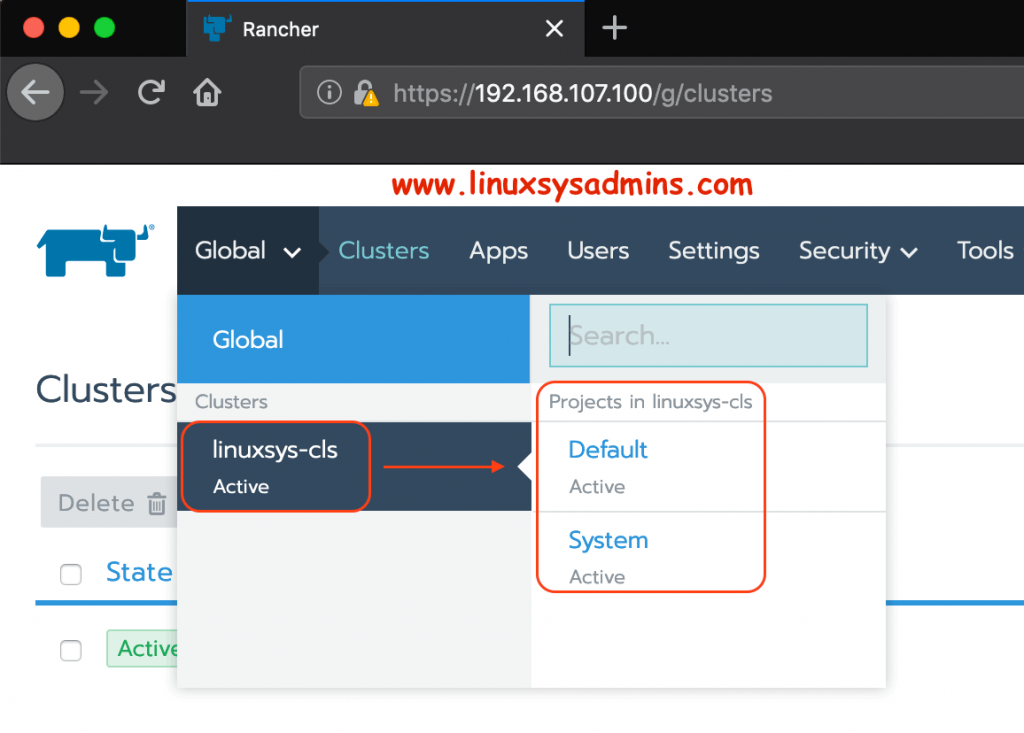
Adding Additional Nodes
To add additional nodes to the cluster just run the docker command on new additional worker nodes. It will take a few minutes to bring those nodes under our cluster. During this progress, the cluster status will change to “Updating”.

Newly added worker node successfully completed and our resource has been scaled.

- The number of nodes as adding a new node.
- Total count of available CPU.
- Added additional Memory.
Cluster Status
Click on cluster name linuxsys-cls to get more information.
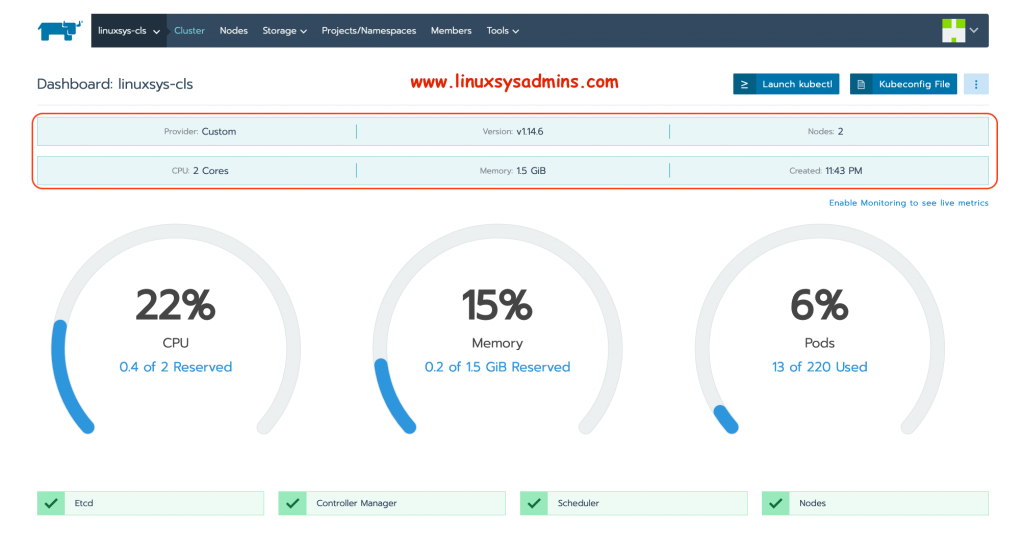
To know each node information click on those assigned node name.

Information from node worker1.
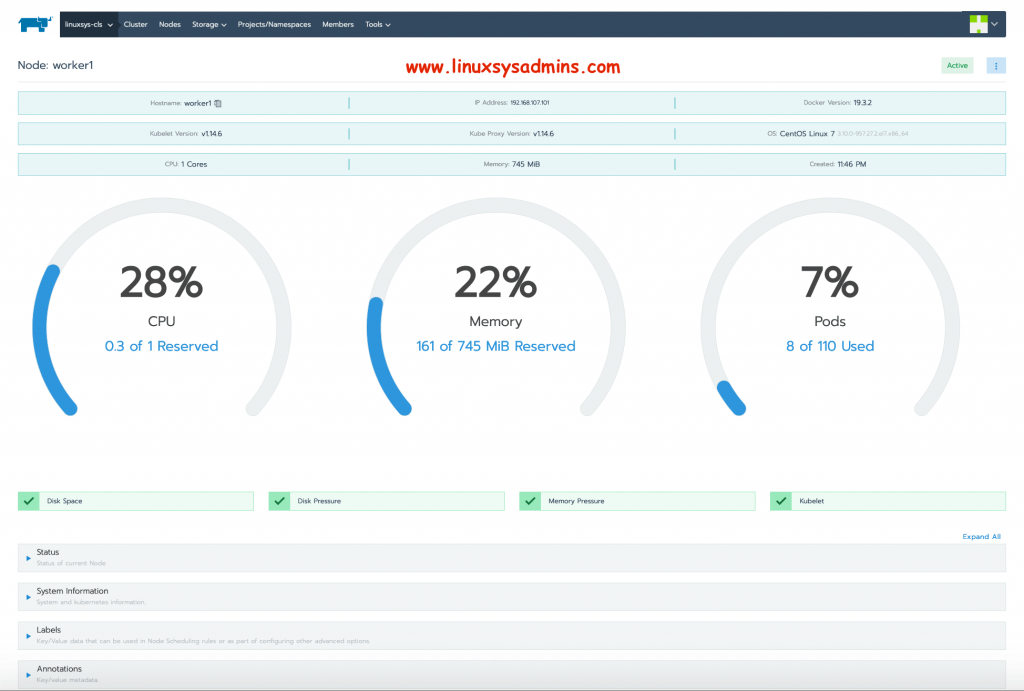
You can navigate through all the options.
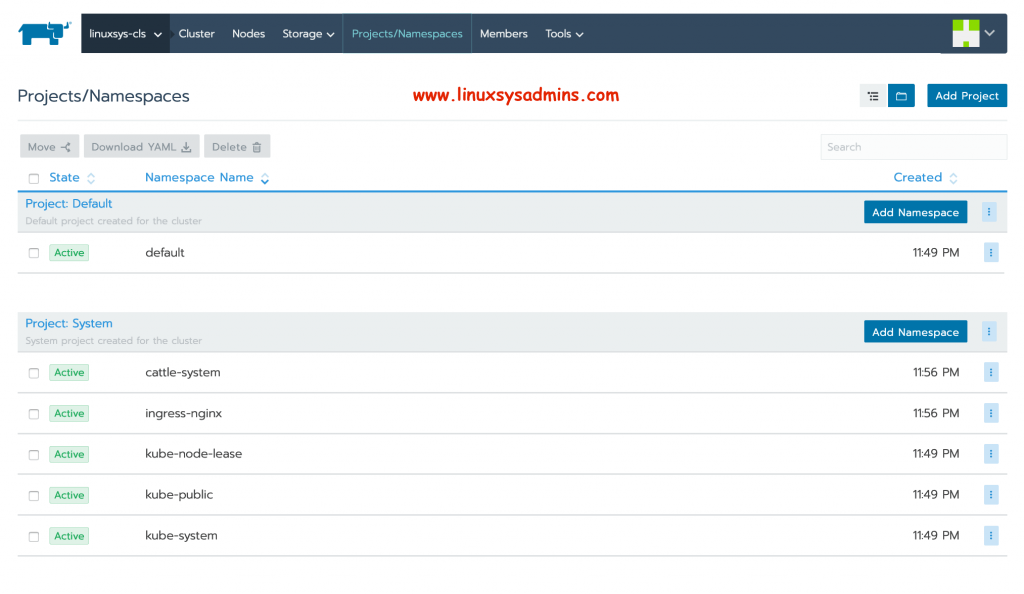
There are a lot of options available and Rancher made it simple to manage from GUI. We have successfully completed with setting up Kubernetes cluster using Rancher.
Conclusion
Setting up a Kubernetes cluster with Rancher made life easier. There are more guides on the way on this series. Subscribe to our newsletter and stay tuned. Your feedbacks are most welcome through below comment section.