Table of Contents
Introduction
Rocky Linux is a Community Enterprise Operating System similar to Red Hat Enterprise Linux, CentOS, Oracle Linux, and much more Linux distributions. The name has been chosen to tribute early CentOS co-founder Rocky McGaugh. The initial release 8.4 is out by the 21st of June 2021 and license under “BSD and others”. Same like RHEL and CentOS this too using RPM Package manager and using DNF as the default update method.
The recent changelog related to Rocky Linux can be found under click here. Finally, the official repository can be found under git.rockylinux.org.
Let’s start with installing Rocky Linux on a Virtual machine, If you need to perform the same installation on a Physical server the same steps are applicable.
Starting Installation
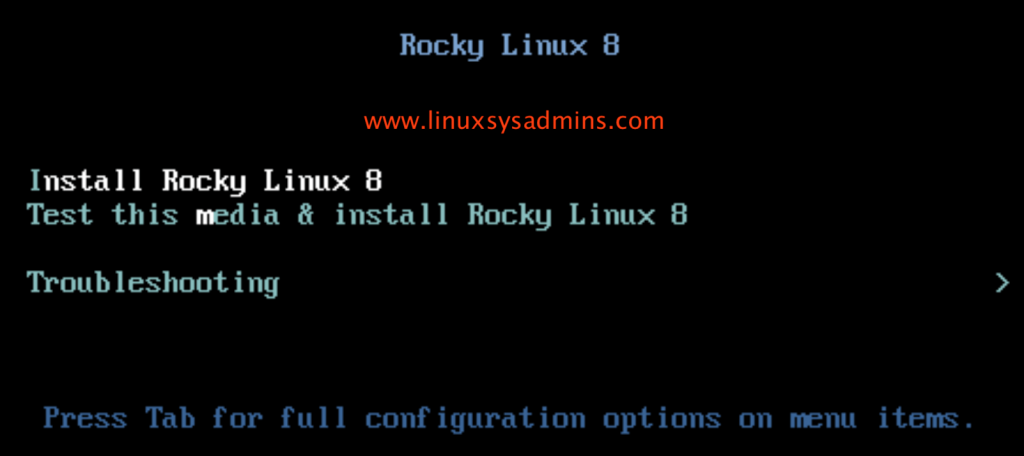
Select the first option “Install Rocky Linux 8” to start the installation.
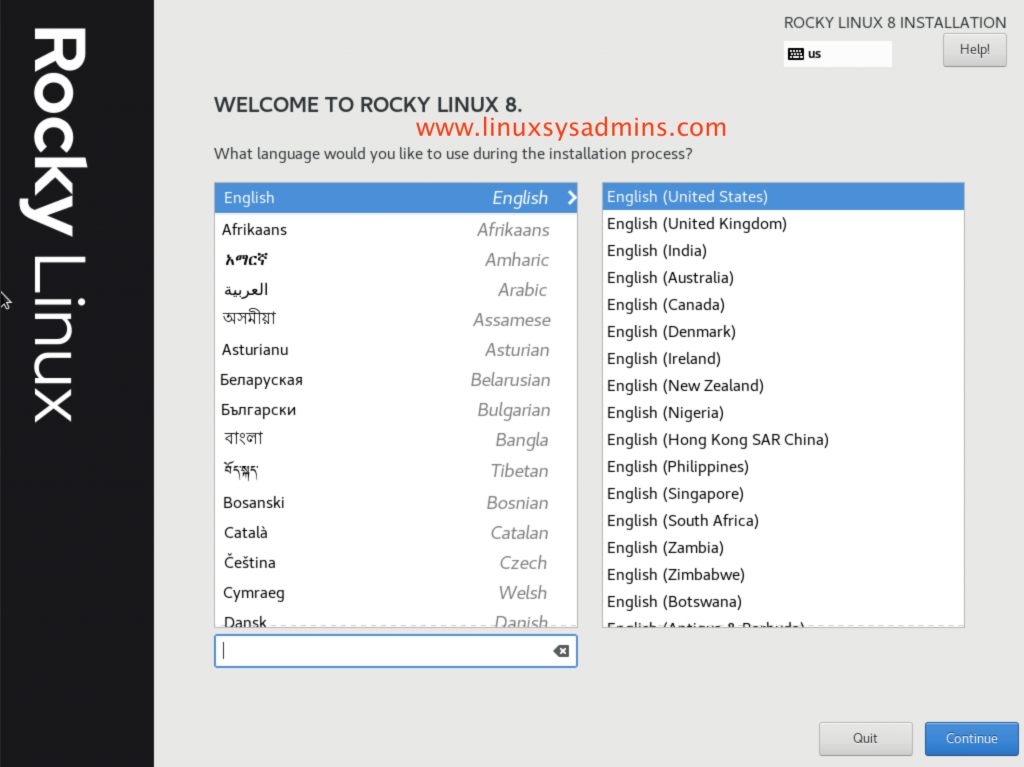
Installation Process Language
By default English will be selected, If you need to select your preferred language select the same from the list.
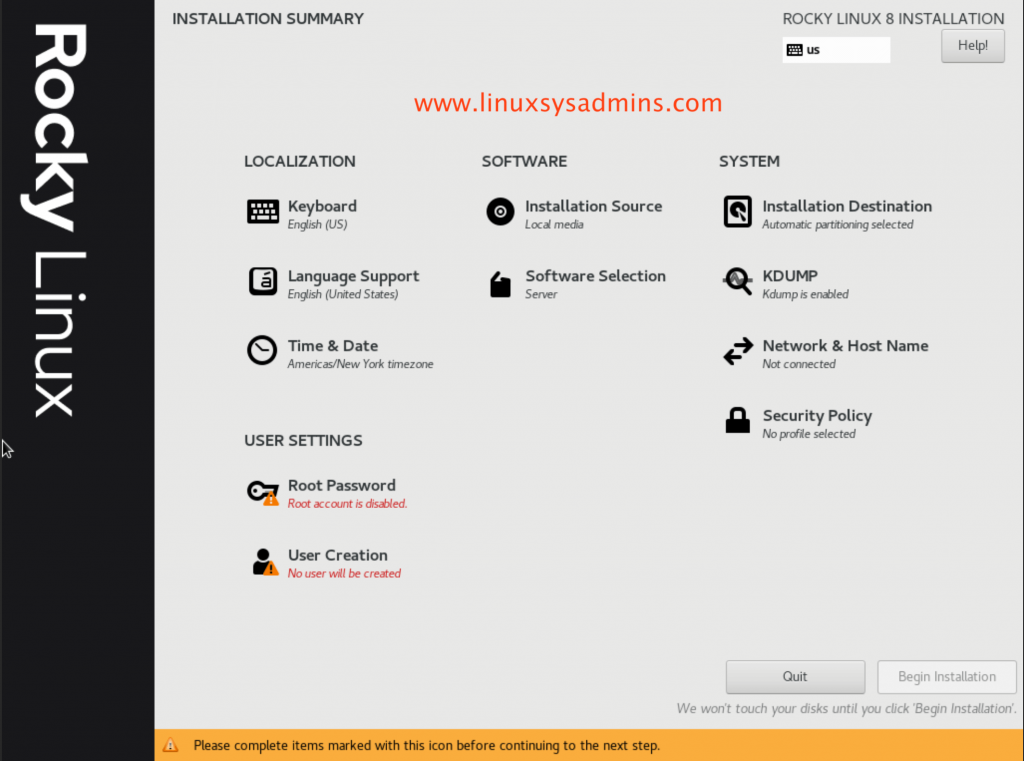
Pre Installation Summary
Before selecting the appropriate settings the Installation summary will be similar to below.
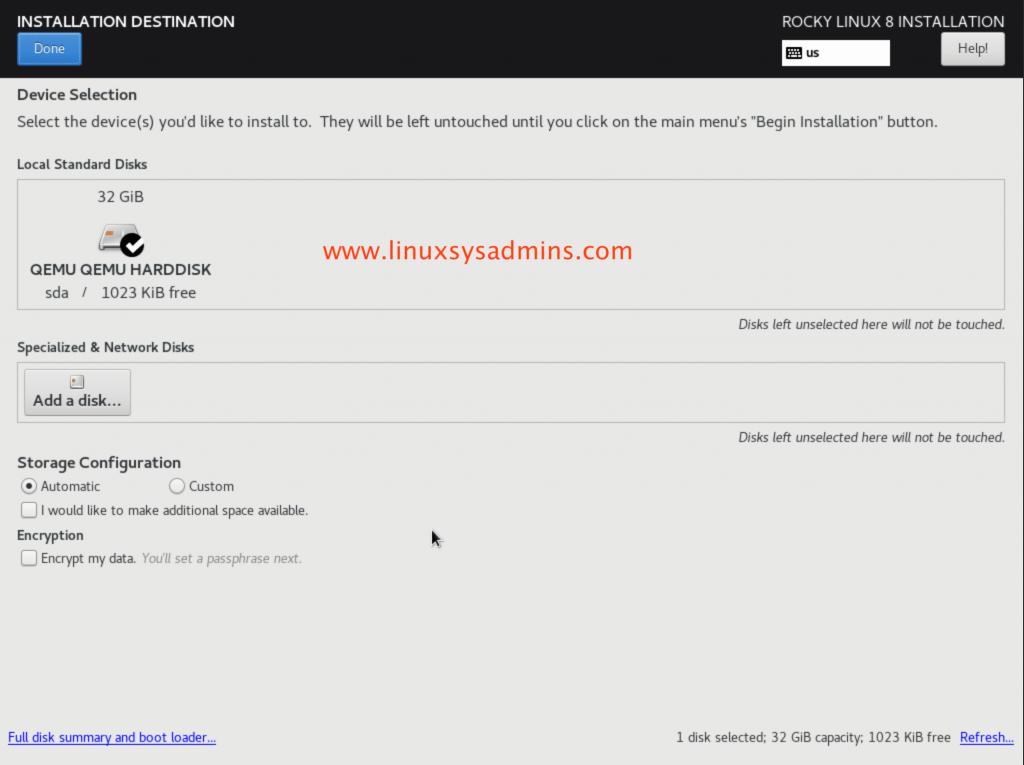
Disk Selection / Installation Destination
Select the first disk and click Done to automatically partition the disk.
If you are looking to partition the disks manually with LVM, follow the same steps as shown in this guide.
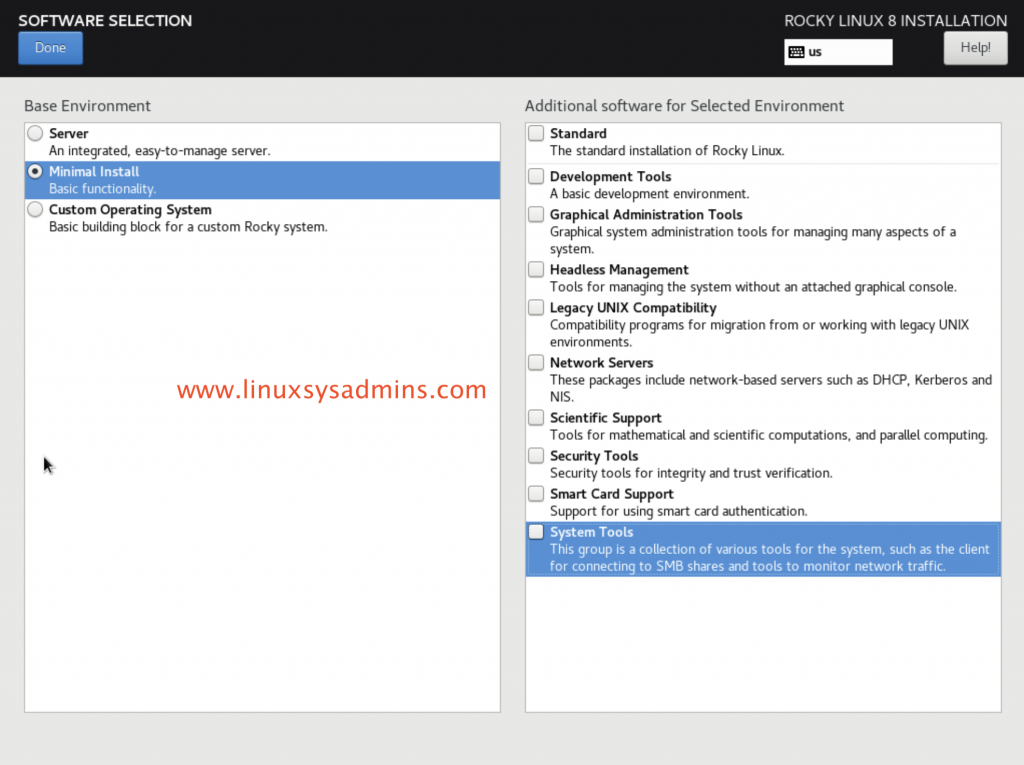
Software Selection | Server Type
We need to perform a minimal installation, so select the “Minimal Install” and select the additional software is required from the right side pane.
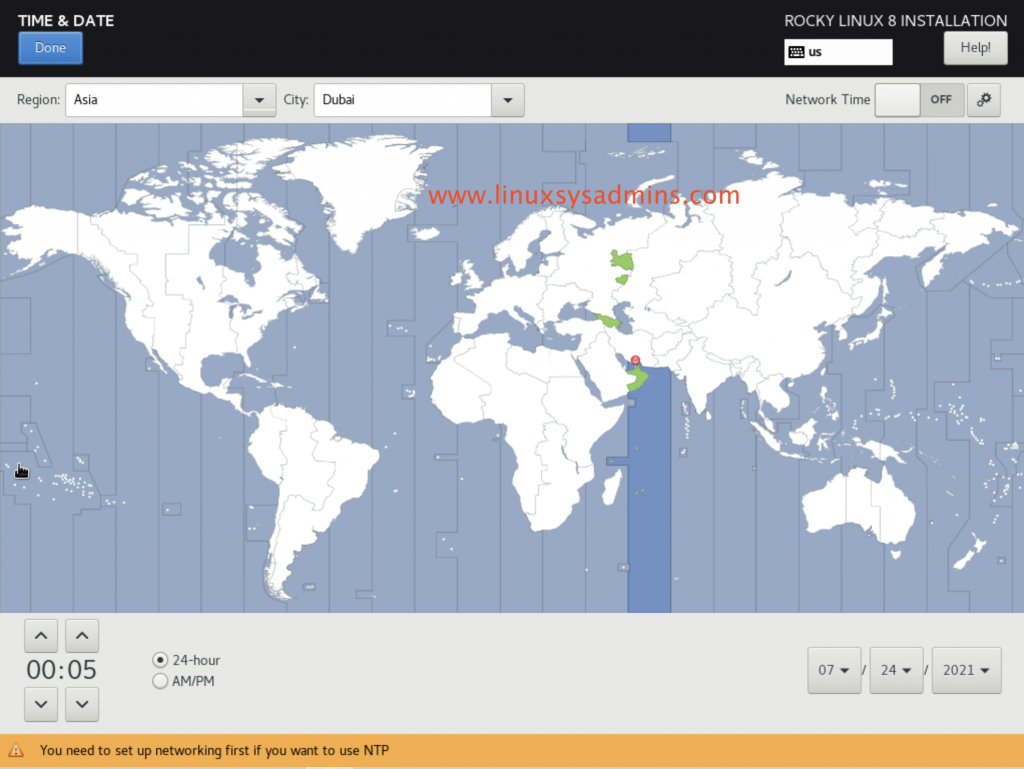
Configuring Timezone and Date
Select the preferred timezone and date.
Configuring Interface
Configure the Interface and hostname.
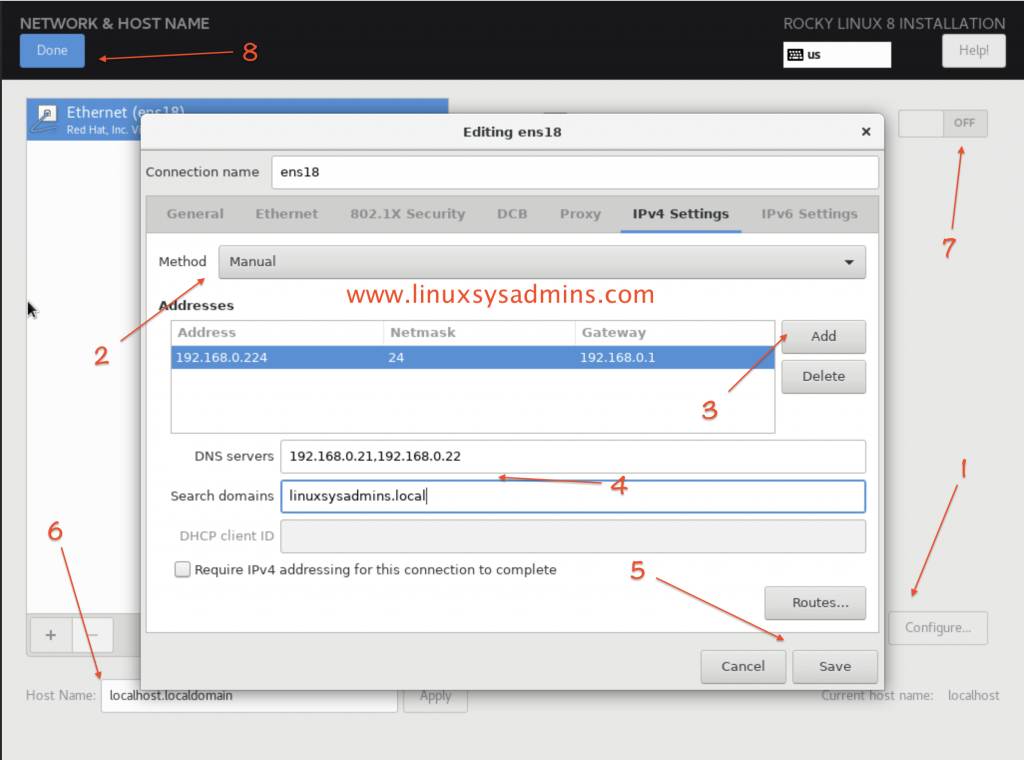
From the Installation Summary screen click the “Network & Host Name” we will get a new window.
- Click “Configure” to start configuring the IP address.
- Select Manual from the drop down list.
- Click “Add” to add the new IP information.
- Set the DNS server and search domains informations.
- Click the Save to commit the changes and close the Interface window.
- Type the Hostname and click Apply.
- Click and toggle to ON the Interface.
- Finally, click the “Done” to save and exit.
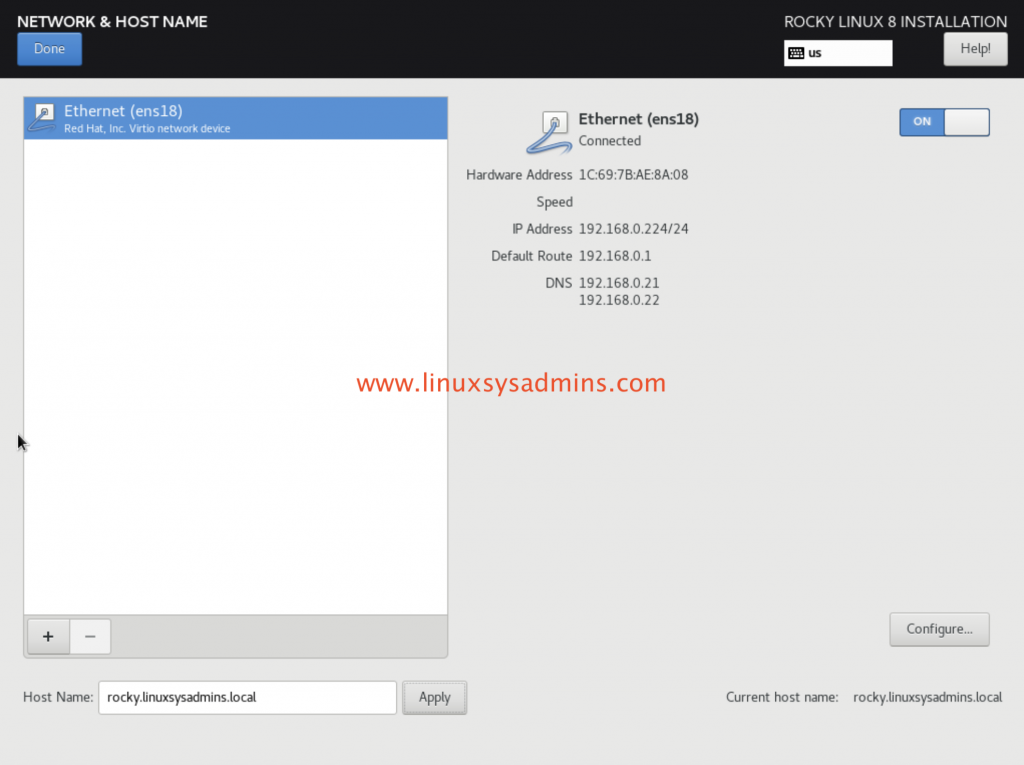
Right after the 7th step, we could see the below IP and hostname as shown in the snip.
Setting Root Password
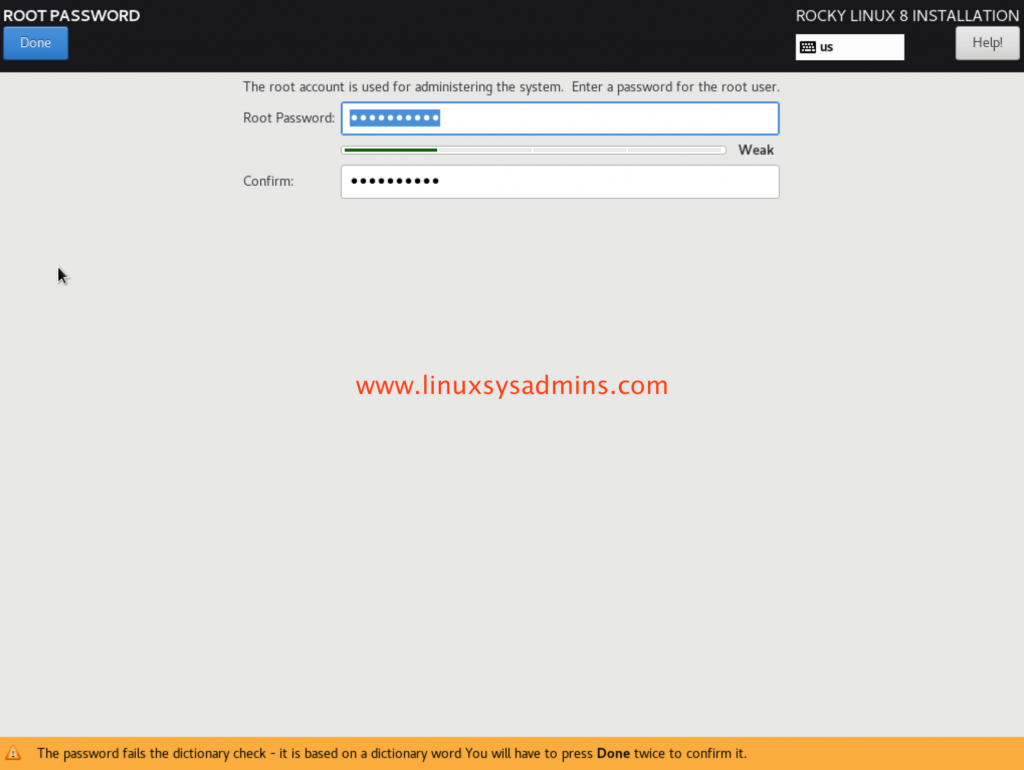
Set a root password for the root user, Make sure to create a strong password by avoiding using the dictionary password.
For demonstration, I have used a weak password and it will give a warning at the bottom of the page.
Creating Addional User
We can create additional normal or privileged users with few customizations.
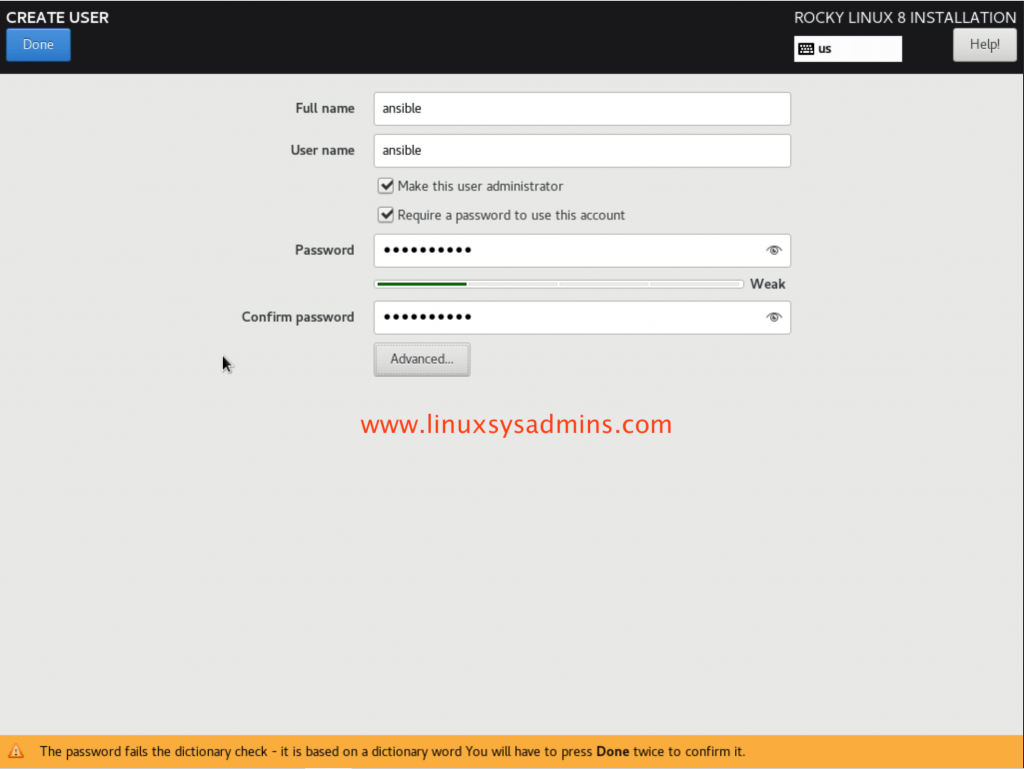
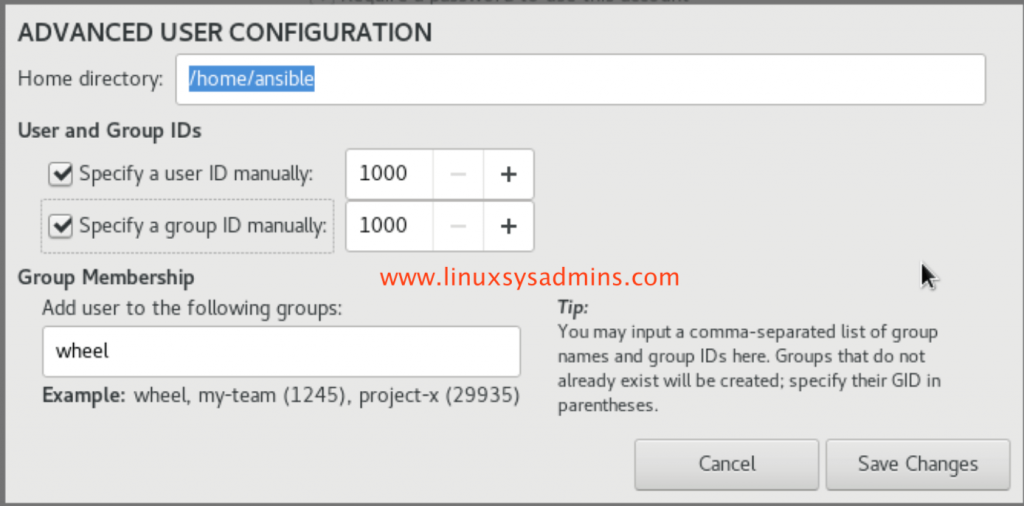
Selecting the check box next to “Make this user administrator” will add a sudo entry.
By following, Click the Advanced at the bottom to start setting the user configuration.
Installation Summary
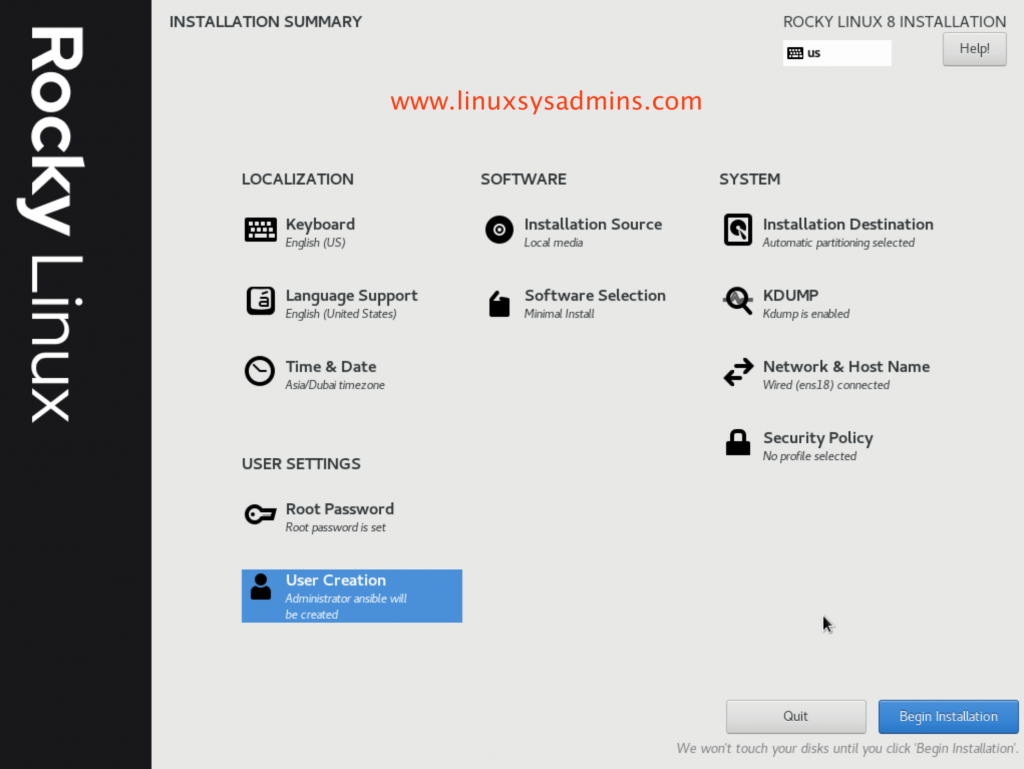
Once all the settings are selected, the Installation Summary screen will be shown as below.
Installation In progress
Click the “Begin Installation” to start the installation, this will take few minutes to copy and install the packages.
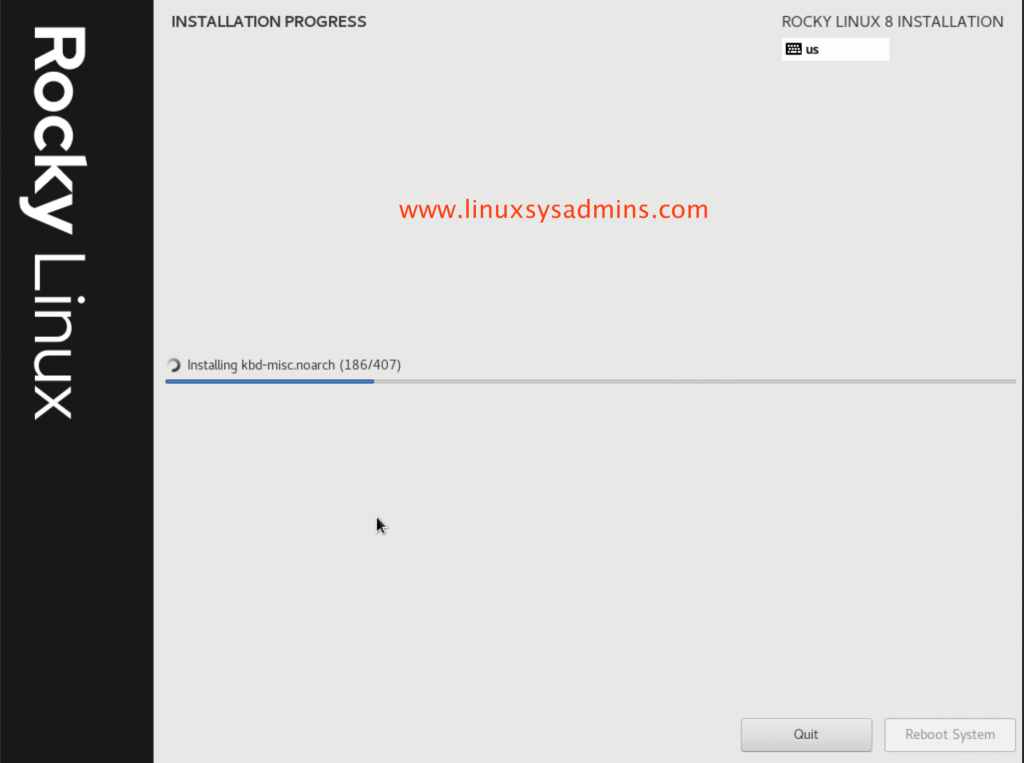
Click “Reboot System” to restart the server.
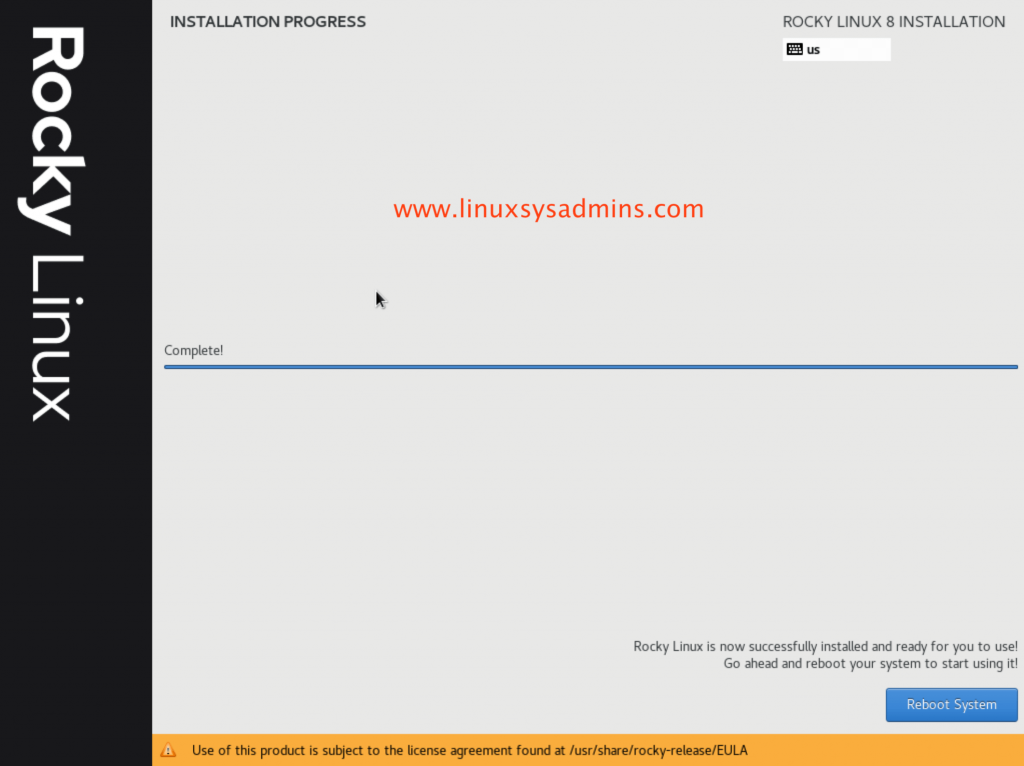
Post Installation steps
After the installation, the server boots for the first time.
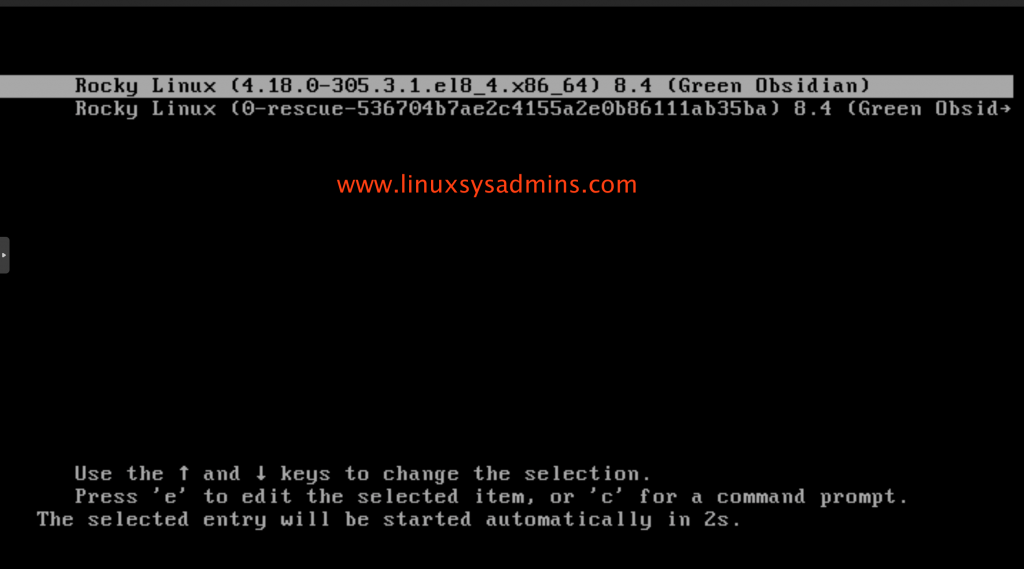
We could see the login screen, use the root user or created user to access the server.

Run few commands to verify the installation.
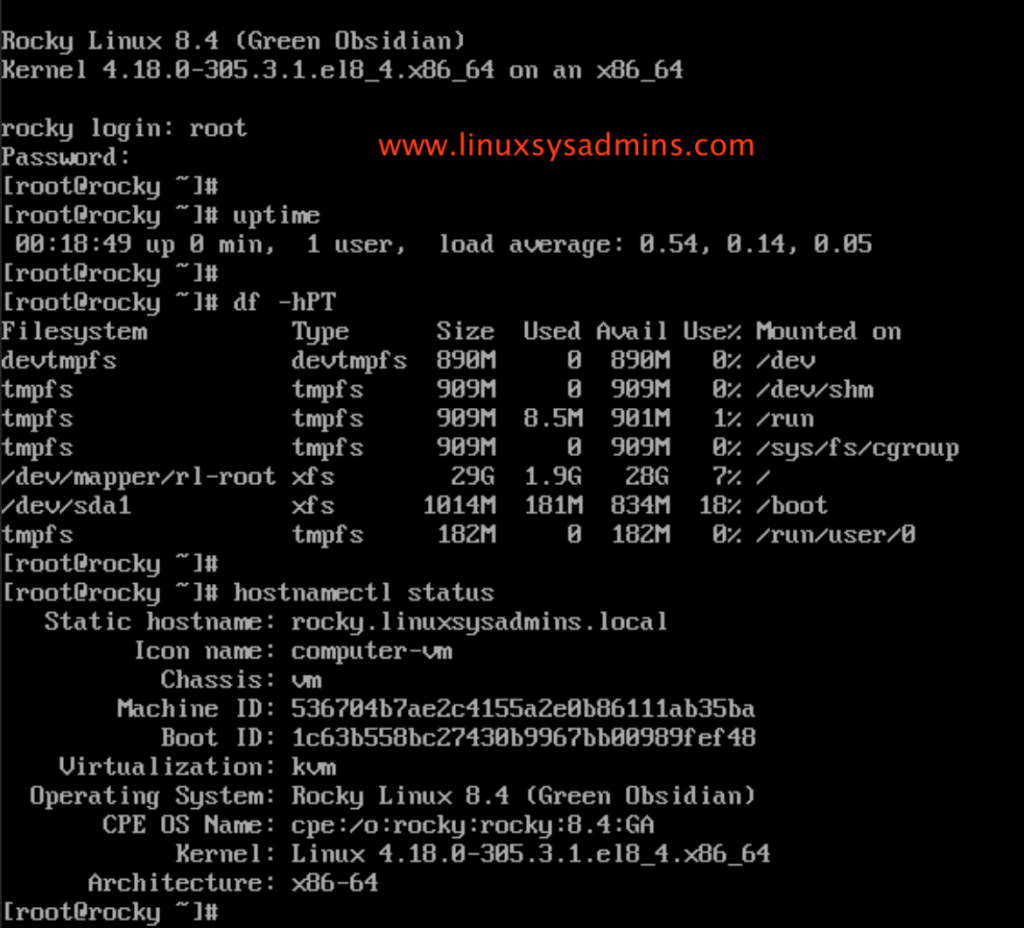
That’s it, we have completed a successful installation of Rocky Linux 8.
Conclusion:
A step-by-step guide for any operating system needed by a new sysadmin or to those who newly started to explore Linux, hope this will help one looking for a brief installation guide on Rocky Linux. Subscribe to our newsletter to receive our updates related to Rocky Linux. Your feedbacks are accepted through below comment section.