Table of Contents
Introduction
Stratis is a new local storage management tool available in RHEL 8, it will help to create layered storage on top of block devices. Stratis will run as a daemon in the name stratisd, as well come with a command-line configuration tool called Stratis-CLI which facilitate users to create, modify or delete pools and file systems.
In Red Hat Enterprise Linux 8 Stratis will be available by installing two packages. Before in RHEL 7.x, we have the BTRFS file system, Red Hat removed BTRFS support in RHEL 8 and provided with Stratis layered storage management system.
To start with Stratis we need to add a number of block devices and create as a single pool, Inside a Stratis
Once RHEL 8 move from beta to production Stratis will available in CentOS 8 as well. Moreover, Stratis will support only on kernel version greater than 4.14.
More topics on Stratis storage management:
Installing Stratis
Now let us start to install required packages by resolving dependencies.
The package “
# yum install stratis-cli stratisd -y
               or
# dnf install stratis-cli stratisd -y
[root@linuxsysadmins ~]# yum install stratis-cli stratisd -y
Installed:
stratis-cli-1.0.0-2.el8.noarch stratisd-1.0.0-2.el8.x86_64
python3-dbus-client-gen-0.3-1.el8.noarch python3-dbus-python-client-gen-0.6-2.el8.noarch
python3-dbus-signature-pyparsing-0.03-2.el8.noarch python3-into-dbus-python-0.06-2.el8.noarch
python3-justbases-0.9-6.el8.noarch python3-justbytes-0.11-2.el8.noarch
python3-pyparsing-2.1.10-7.el8.noarch
Complete!
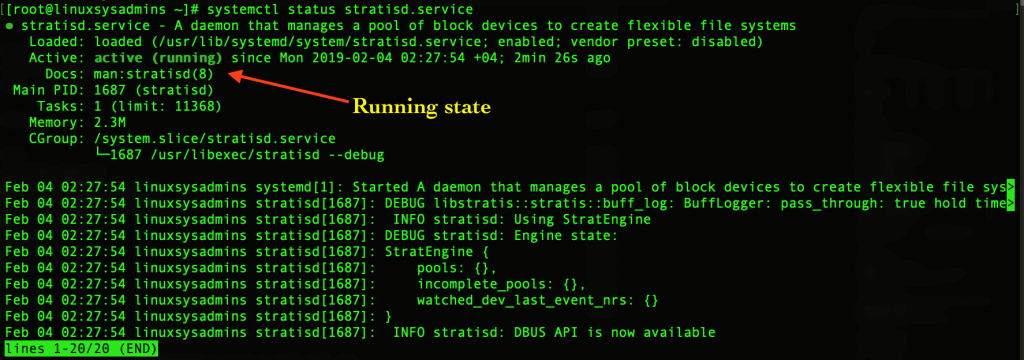
[root@linuxsysadmins ~]# Once completed with installing Stratis start and enable the service persistently, By following verify and confirm the status.
# systemctl start stratisd.service
# systemctl enable stratisd.service
# systemctl status stratisd.service
List the available disks
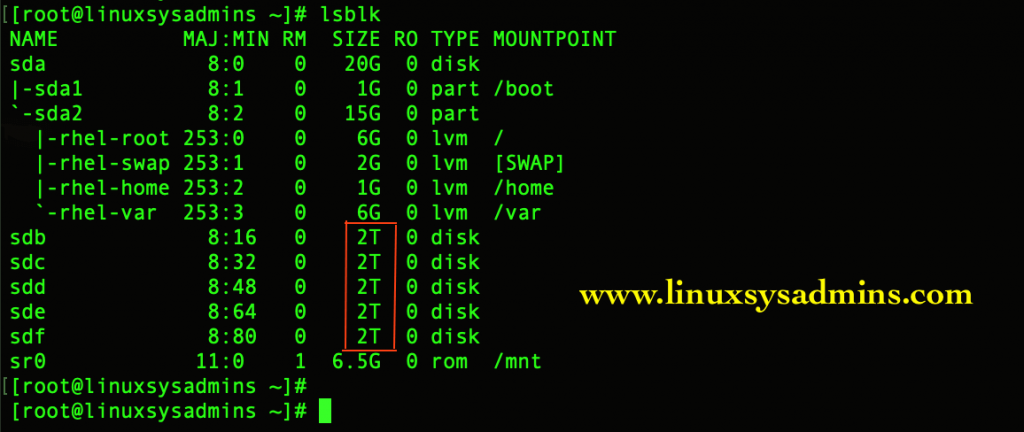
We have added with 5 numbers of 2 TB disks, let us list to verify the size. Now we are going to use only 4 disks in this guide, later in the upcoming article “adding the additional disks” the 5th disk will be used.
# lsblk
# fdisk -l
Free Up the disks to use for Stratis
In case if the disk has any existing old data or headers we need to verify and wipe it off. Replace “
# blkid -p /dev/sdb
# wipefs -a /dev/sdb
List the existing pools and filesystem:
Before creating with any pools and filesystem list and verify.
# stratis blockdev list
# stratis pool list
# stratis filesystem list
Create the pool and filesystem
First, let us create and list the pool in the name of “data01_pool“. To create the pool use 4 disks from /dev/sdb to /dev/sde.
# stratis pool create data01_pool /dev/sd[b-e]
# stratis pool list
- The number of disks used to create the pool.
- Created pool name.
- The total size of the created pool.
- Size of the file system created in it.
- To list the block devices used in a pool.
- Devices name /dev/sda, /dev/sdb etc.
- Each size of disks.
- Disk showing “In-use” is used and contains data.
- Disks tier, whether used for Data or for Cache.
Once the pool created,
# stratis blockdev listNow start to create the file system from the “data01_pool” pool.
# stratis filesystem create data01_pool user_data01
# stratis filesystem create data01_pool user_data02
List the created file systems.
# stratis filesystem list
# stratis fs list
- Creating a file system from a pool.
- List the file System.
The Created file system name.- Currently used FS size.
- When created.
- Device name created for FS.
Mount the created file systems
Once the file system created from the pool, create a mount point and mount the FS. By default, while creating FS it will format it with XFS file system.
# mkdir /user_data01
# mkdir /user_data02
# mount /dev/stratis/data01_pool/user_data01 /user_data01/
# mount /dev/stratis/data01_pool/user_data02 /user_data02/
Create some files inside the mount point and list it again to verify the utilization.
# df -hP /user_data0*
- Created a file system using Stratis.
- Size of each mounted file system.
Adding FSTAB entry
Make the mount point persistent across reboot by entering FSTAB entry by getting the UUID of the mounted file system.
# blkid | tail -n 2[root@linuxsysadmins ~]# blkid | tail -n 2
/dev/mapper/stratis-1-0eaf62ae5c9c4725a3188d7e2a10383e-thin-fs-4e85082029104b0aadd506a440930f3a: UUID="4e850820-2910-4b0a-add5-06a440930f3a" TYPE="xfs"
/dev/mapper/stratis-1-0eaf62ae5c9c4725a3188d7e2a10383e-thin-fs-d5cc59e30aad49da811d7e57f2e1f1e2: UUID="d5cc59e3-0aad-49da-811d-7e57f2e1f1e2" TYPE="xfs"
[root@linuxsysadmins ~]#Edit the /etc/fstab and amend with UUID to the respective mount point.
# vi /etc/fstab

Update the systemd unit by running “systemctl daemon-reload”.
Check the Stratis Daemon Version
To check the Stratis running daemon version use.
# stratis daemon version
That’s it we have created an XFS file system using Stratis. More topics on Stratis will be covered in upcoming articles.
Conclusion
In this guide, we have seen Stratis local storage management which available in Red Hat Enterprise Linux 8 to create a layered storage pool and filesystem. In upcoming guides let us cover with adding additional disk to the existing pool and removing an fs and pool. Subscribe to our newsletters to receive more topics related to Linux guides, Your valuable comments and critics are most welcome.
hey sir i cant install stratisd rhel7 please help